Stress Management for Dancers

Let’s Talk About Stress, Ba-by! Stress Management For Dancers


Let’s imagine for a moment that it’s mid-audition season, and you’ve been hustling.

Callbacks have been generous, which is great, but it’s also created a lot to juggle.

You’ve had to cancel work shifts, find readers for self-tapes, and despite all of this hard work, you’re watching friend after friend bookwork while you’re still hustling.

That is a lot of stress to manage.

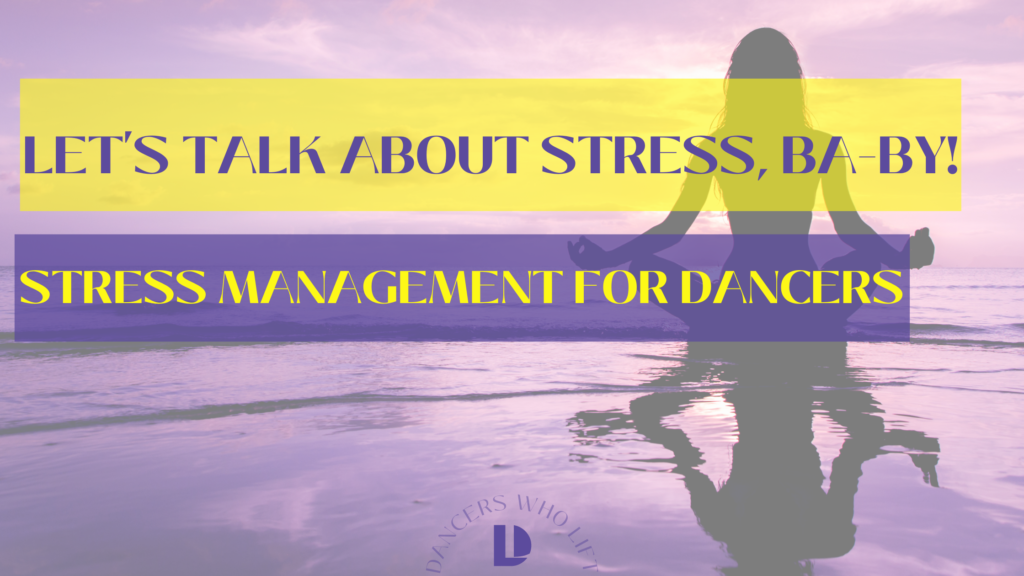
Auditions are physically and mentally, and emotionally stressful. They require you to have full command of your body, a clear mind, and a stable emotional state. Auditions alone are enough to require good stress management skills. Add to that the need for the mental and emotional capacity to cancel or reschedule work and the emotional fortitude to celebrate your friends’ wins while you are still hoping for a win of your own; and you have a recipe for a body that is stuck in stress mode. That’s why stress management for dancers is so important. 

Stress Management in audition room is hard!

Even if you aren’t in a season of auditioning, balancing workouts, dance classes, work, and social life can be incredibly overwhelming. When our lives get this full our bodies have a hard time coming out of “fight or flight” mode and we can end up living in a state of constant stress. Sometimes we don’t even realize we are stuck in this place because it becomes the norm. That’s why prioritizing rest days is so incredibly important. It helps us escape stress mode and return our bodies to homeostasis. How do we do that? By learning stress management as dancers. Because some stress, like the stress we put on our muscles to lift weights or the stress of an impending deadline, is helpful. It motivates us to get things done and gives us the energy to push through tough situations.

So, you might be asking,

“If stress helps to keep us motivated, why is it so bad? Don’t some people have a higher capacity for it than others?”

While it is true that some people have a higher threshold for what puts their bodies into fight or flight, it’s also true that no one’s body is designed to be in fight or flight constantly. This is because fight or flight mode releases a hormone called Cortisol. Cortisol enhances our brain’s use of glucose, and it increases the substances that help rebuild tissues in the body. However, Cortisol also limits the functions of the body that are considered “non-essential”  by altering immune responses, suppressing the digestive system and the reproductive system, and slowing the growth process in our bodies. It also, and maybe most importantly, works with the part of the brain that controls mood, motivation, and fear. That’s why it’s not uncommon for people living in a constant state of stress to have heightened levels of anxiety and depression.

The good news is, there are a lot of tools available to us to help us with stress management.  The first tool I want to tell you about is by far the most convenient because it’s always readily available to you. It is to simply breathe.

1. Simply Breath

When we feel stressed, the first thing that changes in us physiologically is our breathing. When stressed or anxious, you may notice your breath becoming shorter and shallower, or, some people hold their breath when they are stressed or anxious. Either way, the answer is to take deep, long breaths. Consecutive, controlled, deep breaths enlist our parasympathetic nervous system to stimulate relaxation and encourage your body to return to equilibrium; and as a result, you’ll take in more oxygen and your heart rate and mind will start to slow down.

Go ahead and try it right now:

Breathe in through your nose until you can’t fit any more air in. Then, slowly exhale as if you are blowing through a straw, as slow and controlled as possible. Repeat that for a total of six to ten times.

Try this whenever you feel overwhelmed or stressed to support your body rather than fight against anxiety. 

The next thing you can try when you feel stressed is exercise!

2. Exercise.

Now, before you get excited, I want to say, be careful with this one. If you’ve had a crazy active week with multiple classes and auditions, and workout sessions, maybe opt for an activity centered around mindfulness to help your body find some rest despite the stress. But it is true that when we are feeling stressed, movement is an excellent outlet for stress. Not only does it give you an endorphin boost but movement also helps our bodies reset and focus on something new. It doesn’t have to be much, a short walk around the block or a ten-minute yoga flow in your living room will help immensely in moving that negative energy out of your body. 

3. Go outside.

Connecting with nature, feeling the sunshine on your skin, and breathing fresh air, it’s all going to help. Something about simply being outdoors, looking at the clouds, or walking through a park, helps us remember that the world is bigger than we are. And when we realize what a big beautiful world we are a part of, we are able to look at our lives with fresh perspective. If you can’t get outside, try walking over to a window, look at the sky or the trees, and take those big deep breaths; just remember that there is a world beyond the walls you’re sitting within.

The next tool for your “destress toolbox” is sleep.

4. Sleep.

Getting quality sleep is the secret ingredient to improving your overall well-being. You’ve heard us talk about quality sleep as a way to promote faster muscle recovery and speed your progress toward your health goals, but it is also an important part of destressing. When we sleep, our brains continue processing the things weighing on our minds. New mental maps are formed, and memories are transferred from short-term to long-term. Better sleep will help you perform better in all aspects of your life. So how can we ensure we set ourselves up for a good night’s rest?

Create a bedtime routine.

Dim the lights in your room, maybe light some candles-make your space feel cozy and relaxing to you. One of the hardest things to do that can make the biggest difference is turning off all electronics thirty minutes before bedtime. I’ve started replacing that with reading a book or even making a bedtime cocktail while I reflect on the day.

What’s a bedtime cocktail?!

I’m so glad you asked! It’s a drink that is made of natural ingredients that promotes relaxation. My favorite is 100% Tart Cherry juice! It’s a great calming agent to help you prep for bedtime because it contains naturally occurring tryptophan and melatonin, making it the perfect evening beverage! Just mix it with your favorite sparkling water, pour it into a fancy glass, and enjoy something to sip on. This is especially helpful when I’m in the mood for a glass of wine but want to avoid consuming alcohol.

5. Meditation

Meditation is another fantastic tool for managing stress. It allows you to quiet your mind and notice your thoughts, helping you slowing down the racing thoughts often triggered by fight or flight mode. If you’re new to meditation, there are a couple of apps that can guide you into a meditative space. My first recommendation is “Headspace.” This app not only has guided meditations but offers courses and information about stress and stress management. The next is “Shine.” This is designed as a podcast-style meditation so you can put in your headphones, tune out the world, and tune into the meditative space. And finally, there is the calm app. A bonus about this app that they have guided breathing exercises and podcast-style bedtime stories as well as meditations to help you relax and ease into a breathing routine, fall asleep, or meditate.

warming up for dance mentally


These last two tips for reducing stress may seem trivial, but they actually help a great deal. The first one is to get yourself laughing.

6. Laughing.

Laughing will reset your system and give your brain a break from worry. So, look up your favorite comedian, watch a feel-good, funny movie, or call up your friend that always has the best stories and has a big old laugh! And when you’ve finished laughing, do one of your favorite hobbies.

7. Try a hobby.

The things you enjoy, like crafting, baking, or playing an instrument, are the things that make you, you. Spending time doing those activities will bring you back to who you are and, again, remind you that there is so much more to your life than the situations bringing you stress. 

I know this seems like a lot, but it doesn’t have to be. Start by picking just one tool to add to your routine and see if it helps. Then, you can slowly add the others to your arsenal as you’re ready. And a bonus? Stress management for dancers will also  help promote faster recovery between training and performances! The most important thing is finding what works for you so that you can live a life that doesn’t have you constantly stressed out. And it will take practice, but I promise you won’t regret it.

xox

DWL TEAM


Overcoming Plateaus and Setbacks


Overcoming plateaus and setbacks on your fitness journey can be challenging. Whether you’re experiencing bad workouts, struggling with an injury, or trying to decide if you’re too sick to work out, staying consistent despite the setbacks takes determination. It also takes practice recognizing what is a plateau and what is just part of the ebb and flow of serious training. 

Lucky for you, we know you’re determined. So we broke down exactly how you can start overcoming plateaus and start seeing results again. 

Let’s get into it. 

Bad Workouts

Having a bad workout is part of the deal with taking training seriously and being an athlete. The longer you train, the more frequent those mediocre and bad sessions become. “Bad” can be defined in various ways but for the sake of this modification, we are going to use it to describe drastically decreased biofeedback markers like strength, energy, preparation, focus, mind-muscle connection, etc. Once it is determined that a modification needs to be made based on poor biofeedback, we recommend attempting to isolate the variable that is the greatest contributor and reducing the demand for it within the session. This should be an absolute last resort. Exhaust all other resources and efforts before having to modify based on a bad workout. This is NOT an excuse to leave the gym out of frustration. Remember, overcoming plateaus requires you to value determination over motivation. 

Example 1: You only had 3 hours of sleep the previous night and little food before your session, so your energy is very low. You attempt to work around this by acutely (single session) reducing the set volume to ensure the work you are able to do is as productive as possible.

Example 2: You are in a caloric deficit and just had a large macro drop so your strength is taking a hit. You attempt to work around this by acutely (single session) reducing the relative load you are using, so that we can more easily get the prescribed volume in without exceeding the prescribed proximity to failure.

Injury

Injuries are a frustrating occurrence – especially when you are working on overcoming plateaus. But acute injuries, such as muscle strains, are less likely than you might think, and catastrophic weight room injuries are very rare. You can avoid the vast majority of injuries, aches, and pains by lifting with good technique and adhering to a planned progression of effort and load. If you do sustain an injury, or flare up an old one, is important to note two things:

  1. Muscles heal relatively quickly, and you will regain all of your old size / strength (and then some) as soon as you get back to training at full capacity.
  2. Injuries will rarely require you to filly stop training. Training through an injury is reckless, but there is almost always a way to train around it. You may even be able to perform the same movement that you, albeit a modified load, tempo, and range of motion 

Sickness

No matter how proactive we are, eventually we all succumb to some illness, virus, or “bug.” Severity and infectiousness will dictate your ability to train, but it is almost always better to stay home until you have recovered instead of trying to train through it and potentially make yourself sicker and / or infect others. 

Symptoms that should deter you from training:

  • Vomiting
  • Severe muscle spasms
  • Diarrhea
  • Severe migraines
  • Body aches / chills
  • Fever

Symptoms that can be trained through in moderation:

  • Headache
  • Congestion
  • Sinus issues due to allergies 

Consistently Poor Biofeedback

If you have multiple poor performance in a row, say a whole week or two of workouts where you feel fatigued or overly sore, then something probably needs to be changed. You may need a week or two of lighter training (refer to Deloading) or reduce your workload so you can recover better. One bad workout is not a cause for concern, especially when one of the usual suspects is acute poor sleep, missed meals, or an especially stressful day. As we have emphasized, improving your physique and performance is a long-term process, and any one session means little in comparison to months of consistency and hard work. 

Missing Workouts

Just as one bad workout means little in the grand scheme of things, missing one workout will not set you back. If it happens, be transparent with your coach, if you have one! They may keep the rest of the week’s workouts exactly the same, or they may adjust the schedule so you can still in some of the important work from the day you missed. If missing workouts becomes a common occurrence, it would then be necessary to make a change. Fewer weekly workouts, completed consistently, will always beat a sporadic schedule. Your coach will be designing your program with a specific progression (refer to Progression Models), so if you see your schedule becoming more unpredictable, just let them know and make adjustments. 

Stalled Progress (it’s not a plateau!)

What people often think of as “plateaus” are more often the result of unmet expectations of rapid progress. There may be times when your performance or physical appearance seems to change rapidly, but by and large, gaining strength is a long-term process. Growing new muscle tissue is even slower. Fat loss can happen relatively quickly, but even then, the scale and mirror may not always reflect that progress on a daily basis. If you feel that your progress has stalled for a few weeks, let your coach know! They may be able to point out plenty of areas where you have made progress; but if need be, they can also make necessary adjustments to your training program or diet.


Eight Ways to Promote Faster Recovery


As professional dancers, we know how important it is to be ready at any moment. That’s why we continue to take classes, lift weights, and focus on maintaining healthy nutritional habits. That’s also why we need to promote faster recovery of our body, mind, and muscles. 

Being that active can easily lead to sore muscles– and nothing is worse than being surprised by a tight hamstring the morning of an audition. While planning out your workouts with your trainer can help prevent this, there are also a lot of things you can do on your own that can promote faster recovery between workouts and rehearsals.

I didn’t want you to miss out on any, so I created a tidy little list of eight things you can add to your routine to promote faster recovery. Let’s get started!

One: Eat Plenty Of Protein

I know I know, I know. It probably feels like you are ALWAYS hearing me talk about the importance of protein. And honestly? It’s because I am. Ensuring you have protein with every meal and after any workout or rehearsal helps muscles rebuild faster and will reduce soreness. This is because protein is made of amino acids. Amino acids act like building blocks for the body. So, eating protein after a workout or rehearsal gives your muscles the amino acids they need to rebuild after a tough session!

Two: Hydrate

Hydration may seem like a no-brainer. I mean, aren’t we a generation of people who carry emotional support water bottles and hydro-jugs? But you’d be surprised how often we are dehydrating ourselves as dancers. Outside of our coffees, teas, and occasional alcoholic beverages, we are expelling water from our systems every time we sweat. This means we must drink more water than the average person to meet our bodies’ fluid needs. Not only does staying hydrated promote healthy skin and prevent brain fog, but it also helps our bodies flush out excess lactic acid, promoting faster muscle recovery and resulting in less soreness. 

Three: Epsom Salt Bath

Warm baths with fancy salts and bubbles might seem like a luxury, but for athletes taking a soak has wonderful benefits for recovery and can be a great tool for relaxing muscles and promoting better sleep. While a warm bath of any kind will help release muscle tension, Epsom salts contain magnesium, an important mineral known for its anti-inflammatory properties. Magnesium also plays an important role in regulating melatonin production, which is the hormone that promotes sleep. Magnesium is said to promote relaxation of the parasympathetic nervous system, helping to relax your muscles, quiet your nervous system, and get better rest. If you love your weekly Epsom salt bath, you might even consider adding a magnesium supplement to your evening routine! (But always ask your trainer or doctor first!)

Four: SLEEP

It’s easy to joke about needing your “beauty sleep,” but getting at least 8 hours of sleep a night might be the most important recovery practice of all! Sleeping is the only time a body can truly recover and repair. You’d be surprised how much energy is used by our body to simply keep us awake! Additionally, sleep is the only time our body gets into a cycle known as “Non-REM Sleep,” “slow-wave,” or “deep sleep.” During this type of sleep, our blood pressure drops, and our breathing slows. Our brain experiences very little activity during this cycle, increasing the blood supply available for flowing to our muscles. This delivers extra oxygen and nutrients, which facilitates muscle healing and growth. As if that’s not enough, this cycle is also when our bodies release a growth hormone that promotes tissue growth and muscle repair.  Without 7-9 hours of sleep a night, our bodies experience a decline in growth hormone production resulting in a loss of muscle mass and reduced capacity for exercise.  

Five: Hobbies Away from Dancing

Let’s talk for a second about how important it is for our minds to get a break from Dance. Pursuing a career as a dancer is complicated because it feels equal parts job and equal parts dream. It’s very hard to differentiate between what we do and who we are when we feel so passionately about something. But the reality is, each of you is a whole person who is enough even when they aren’t dancing.

Hobbies can be complicated for artists because we learn something, and, in our industry, it is easy to start leveraging that thing for our careers. But having a hobby that you keep completely separate from your profession has huge benefits for you as a dancer and athlete! Working on something with zero pressure attached is a great way to reduce stress and give our brains time to recover mentally. I encourage you to try something new this week. Maybe you could learn to knit, pick up a coloring book, or remember how much you love to read!


Six: Long Walks

As you’ve already read, taking twenty to thirty-minute walks gets your blood pumping enough to get oxygen into your muscles, which promotes muscle recovery. Not only that, it’s one of the few ways we can promote muscle recovery while remaining active. Walks are the perfect thing to do between workouts on a rest day while still ensuring you get all your steps in. An added benefit? Long walks provide enough endorphin release to lift your mood and support your daily mental health. I like to pair my walks with a favorite podcast or a phone call to an old friend!

Seven: Foam Rolling

I don’t know about you, but foam rolling has always had a very cool mystique to me. Whenever someone was foam rolling, it was because they had worked hard enough to “need to.” It’s a silly thought, born from being a young dancer because foam rolling benefits anyone who uses their body as much as we do. Foam rolling allows us to break down fascia buildup, relax tight muscles, and increase circulation.

Do any of those benefits sound bad? Exactly. You want to roll as slowly as possible to get the most out of your foam rolling session. This gives your muscles time to relax. It should feel like it “hurts so good.” If it’s too intense, try a softer-grade foam roller or a different type of stretching. There are many different types of foam rollers for different types of exercise, muscles, and stretches. So, feel free to shop around until you find something that will suit your precise needs.


Eight: Be In Nature

Spending time in the sunshine and fresh air can be a huge stress reliever and mood booster–ESPECIALLY if you have spent long hours indoors in a studio or dark theatre. Like plants, our bodies need sunshine to create certain vitamins. One such vitamin is vitamin D! While we can get this vitamin into our system through different foods, our body produces it naturally when we are exposed to sunlight! Vitamin D helps with our absorption of calcium and phosphorus, which help our immune system and bone development. There have also been studies that suggest vitamin D can help regulate our moods and decrease our risk of depression.

So, what will you be trying out this week? Do you already have a favorite? Let us know @dancerswholift on Instagram or TikTok. We’d love to see how you actively support recovery to optimize performance. In the meantime, try adding one of these things to what I am sure is an already packed schedule. Give it a few weeks and see how you feel. I think you’ll be surprised how a couple of tiny changes can make a big difference.


Direct message us on Instagram or TikTok. Or tag us in a post to let us know how do you recover?

xox Am 

PS if you want to work with a pro-dancer/ certified personal trainer who can make tailored training, nutrition, and recovery plans for you, you should check out our 1:1 coaching program, The Embodied Artist Academy

Functional Strength Training

5 Functional Strength Training Moves For Dancers

I’m going to give it to you straight; figuring out what exercises to do in the gym can be confusing. From “Fitfluencers” on TikTok to the hundreds of fitness apps, the plethora of exercises bombarding gym newbies is overwhelming. As dancers, we are acutely aware of the repercussions of an injury from the gym. So it’s no surprise that a lot of us are deterred from lifting weights when the “how” of it all is unclear. Never fear; we are going to break down functional strength training today. 

First, we must learn that there are two main approaches to lifting weights: Traditional Strength Training and Functional Strength Training.

Think of traditional strength training like your isolation in dance class. You are focusing on one specific muscle group and putting it under stress with weight to make it stronger. An example of this would be hamstring curls. You’re specifically curling the hamstring in isolation from your other leg muscles. In your daily life you don’t necessarily need to isolate just your hamstring, but making it stronger has benefits for jumps, joint health and more. Just like learning to isolate your head helps you spot more cleanly and strengthens your neck.

Functional Strength Training, on the other hand, improves your body’s ability to perform everyday functions. Think of this like your plies, relevés, tendus, and balance–foundational movements that are a consistent part of your dancing. There are five functional movements that are the perfect building blocks for a full-body lift session at the gym. So, let’s get into it!

1: SQUAT

 Squat form

We hear about squats a lot. But what defines a squat? Simply put, a squat is defined by flexion in the hip, knee, and ankle joints. During your workout this might look like a back squat, goblet squat, or walking lunge. Squats in the gym help us get up and down off the ground or out of a chair – even as we age. In real life, squats can be as simple as sitting down in a chair or running up and down the subway steps to catch a train! 

2: HINGE

Functional movement Hinge

No, we aren’t talking about Horton Jazz Technique! In the fitness world, a hing occurs when the hip joint hinges backwards causing the torso to arrive at tabletop position. During your workout this could look like any type of deadlift or Romanian Deadlift variation. Its everyday cohort? Bending over to pick something up. Lifting weight through a hinge position decreases your risk of back pain and injury while doing things like moving heavy objects. So next time you’re moving apartments, make sure you work a few of these into your lifting session.

3: PUSH

Strength Training Push

Push movements occur when a weight is pushed away from the torso. In the gym this would be any type of push-up, overhead press, or chest press variations. In everyday life this looks like closing a door or getting your luggage into an overhead compartment on an airplane. No more relying on the nice dad in the row behind you to help you. You’re a strong independent frequent flier now!

4: PULL

 Pull-up

Unlike push movements, pull movements happen when weight is pulled toward the torso. This is where our rows and pull-ups fit into the workout. In “real life” this includes opening a door, or pulling yourself onto an elevated surface like getting up out of a pool…or beating your dog at tug of war! 

5: CARRY

Functional Strength Training Carry

This one really is as simple as it sounds. A carry movement occurs when you add weight (or load) to your body and then transport yourself and that weight to another location. In a workout, this would be a suitcase or farmer’s carry. In life, this looks like carrying your Trader Joe’s haul home and up to your third-story walk-up.  

So, if you’re looking to create a lifting workout for yourself, try using functional strength training moves. Building your workouts to include one exercise for each of these movements yields an incredibly effective lifting session. And don’t be fooled; each of these functional strength training movements is effective for your dance training as well. Squats translate to deeper pliés for preparations and big jumps. Hinges result in stronger spinal alignment for turns. Push and pull exercises help with floor work and partnering. And carry exercises give us the strength to lug our dance bags around without a care in the world.

So try this format at your next gym session, and let us know how it goes.

Direct message us on Instagram or TikTok. Or tag us in a post to let us know which functional strength training movements you’re working on today. We’d love to see what you choose!

xox Am 

PS if you want to work with a pro-dancer/ certified personal trainer who can make tailored training, nutrition, and recovery plans for you, you should check out our 1:1 coaching program, The Embodied Artist Academy


How to Crush Your Fitness Goals When Performing on Cruise Ships

Performing on a cruise ship is a pretty sweet gig.

You get to do what you love while exploring the world. No rent. Free food. Plenty of downtime to hang out and work on personal projects.

And oh yeah… you’re getting a paycheck that’s probably double or triple what the local theatre production of Mama Mia is paying.

I’m a realist to my core, so I need to tell you that performing on a cruise ship isn’t all shimmies and sunshine.

You live with your coworkers (drama WILL ensue).

There are loads of nonsensical ship rules that you have to follow.

And you’ll encounter some serious roadblocks to your health and fitness goals.

One day you’re a starving artist hustling through the streets of *insert city here but probably NYC.*

Next you’re a contracted employee with a stable income, cheap booze, unlimited free food, and loads of free time.

There are hot pancakes and bacon every morning?

Wine for $2 a glass? I can stay up until 2 am without worrying about the A train not working or that 6 am alarm?

Next thing you know, you’re stepping onto a scale for weigh-ins*, and the wardrobe manager is whipping out the dreaded tape measurer.

*The industry is rapidly changing to accept all shapes and sizes.

However, whatever body size you are when you’re fitted for costumes is the size you need to maintain.

The costumes need to fit, and it’s often cheaper for them to send out someone new than have a new costume made.

How do I know all of this? Well, I’ve experienced it.

Maybe It’s Time to Introduce Myself…

Hi. I’m Katie!

I was born and raised in Staunton, VA and a wannabe competition kid throughout my youth. (I say wannabe because the team didn’t go to many competitions… maybe 3-5 a year.)

A member of said competition team with the fearless founder of DWL herself! Dance was my life, love, and passion, so I pursued it in college.

I graduated in 2015 with a BFA in dance and BS in economics from George Mason University.

I proceeded to dance professionally across the tri-state area, across the country, and across the world.


Which segues us back to ships….

I’ve spent 21 months performing on cruise ships. And an additional three months (and counting) at sea as a partner on board. (My fiancé works on ships, and I’m currently sailing with him around Africa!)

My first contract was a trainwreck in terms of fitness and wellness.

Recall those pancakes and $2 glasses of wine I mentioned earlier.

Well… that was my life.

Food-wise, I was going ham on the buffet because I had just spent three months needing to budget for every single item in my grocery cart.

Booze-wise, I was living out the college days I never got to have because of my double degree workload.

Sprinkle on pasta and gelato in port because my contract was in the Mediterranean.

The next thing I know, I’m 10 lbs heavier, and that dreaded tape measure is being wrapped around my legs.

I was mortified.

So, I went on a crash diet. Nearly zero carbs and no alcohol, coupled with skipping meals and an intense gym routine.

I lost the weight.

But I also lost so many amazing experiences in Spain, Italy, and Greece because I was so obsessed with everything I was putting in my body.

Then BAM. Hamstring strain.

No more gym, and no more willpower to live on chicken, egg whites, and vegetables.

Surprise! I gained the weight back just as the contract came to an end.

My second contract was also a trainwreck, but in a different way.

I walked onto the Konningsdam with an intense fear of gaining weight.

Instead of having a coach and a plan, I restricted carbs, and I told myself that a quest protein bar was acceptable as a meal.

I lost weight and was super lean and fit.

Everyone told me how great I looked, which further fueled the fear of weight gain.

Here’s the thing, I WAS enjoying alcohol from time to time and I WAS enjoying food in the Baltic.

Plus, I was lifting heavy things and getting stronger.

At the time, I truly believed I was making smart choices and being “healthy.”

In hindsight, I see that I wasn’t treating my body kindly.

Which brings me to my third contract (and beyond…)

After taking a year off from ships, I headed to the Westerdam with a coach in my pocket (oh HEY DWL!) and much more knowledge about fitness, health, and nutrition (during my year off from sea, I was working as a fitness professional in NYC while auditioning and performing around the tri-state area.)

I FINALLY cracked the code on how to turn cruise ship goal-busters into goal-boosters to live a well-balanced life.

Which is what I’m here to chat with you about!

I’m sharing the top tips and tricks I’ve learned over my time performing on a cruise ship to help you walk off that gangway for the final time happy and confident.

First things first, set your goals and/or wellness bench markers you want to reach/maintain during your contract.

While they can be aesthetic, I personally have found much more happiness and success when I set intrinsic and performance-based goals instead.

Everyone’s goals will be different!

Think long and hard about yours and write them down. Maybe it’s to deadlift 1.5x your body weight. Maybe it’s to get 8 hours of sleep every night.

Maybe it’s the ability to enjoy a great meal without food guilt….

My current stint onboard is 52 days (35 days in at the time of writing this…), and I set 4 goals.

  1. Smith Machine Sumo Deadlift: 150lbs, 5 sets of 5 reps
  2. 3 Point Row: 45lbs, 5 sets of 5 reps
  3. 150 minutes of cardio every week. (I LOVE strength training, but since I’ve retired from dancing, I haven’t kept up my cardiovascular health. Getting that endurance back has been a rewarding challenge! A mini goal within in this was to run 3 miles without stopping…. check!)
  4. Write 30 minutes (for myself/The Frugal Foodies) every single day. (A mini goal within this is two blog posts a week for Thefrugalfoodies.com)

And here are my personal benchmarkers for checking in with my mental and physical wellness…

  • Monthly Period: Me and my period have a rocky history. Getting it every month is one of my primary benchmarkers of total body health.
  • Shiny Nails
  • Sleep Quality

Now let’s get into 3 rules of ship life that will help you conquer whatever goals you might have set.

Rule #1: Prioritize Nutrition on the Ship, Enjoy Yourself When You’re on Your Trips!

The Cruise Ship Goal Buster: Free, endless food with no nutrition labels and no way to count macros.

The Cruise Ship Goal Booster: Free, micro nutrient-dense food is available every day! No meal prep, no $$$$ required!


You are a smart performer who already knows what a well balanced, fueling meal looks like.

The problem is that life gets in the way. Callbacks, getting asked to do a double, getting stuck on the A train for 30 minutes, and deciding to hop into a class last minute makes it really freaking hard to meal prep, cook, and stick to your well-crafted plan.

Those problems don’t exist on ships. And being on contract is your perfect opportunity to zone in on how you fuel your body.

“Okay cool… but Katie… there are no nutrition labels!!!! How do I approach the Lido?! Those goal busters are pretty brutal….”

You’re a savvy Dancer Who Lifts! It’s all about creating your “Lido Meal Plan” and sticking to it!

I am not qualified to give nutrition advice and I highly recommend working with someone who is.

However, I’m going to share what type of Lido Meal Plan works.

I joke that I eat every single meal out of a bowl… and it’s true. I do! So I’m officially coining it as “The Bowl Method.”

I start at the salad bar with a big bowl of raw veggies (micro-nutrients…check!) along with chicken or turkey (protein…check!).

Then I make my way over to the hot line and choose a protein that has minimal sauce (because we heart protein), whatever cooked veggies they have because they usually have oil on them (more micro-nutrients+fats… check!), and rice (carb… check!)

Then I dump the plate into the bowl, mix it all together, and dig in.

This method is what leaves me feeling energized and fueled.

Bonus Tips!!!

  • Having protein powder in your room makes it easier to reach your protein goals. (I put some in a little baggy and add it to my oatmeal for breakfast)
  • Counting macros isn’t for everyone… BUT doing it for a month or two can teach you how to guestimate your meals if you need a less intuitive, more concrete approach.

I prioritize my “Lido Meal Plan” on board to enjoy the amazing foodie opportunities in port!

Nutrition is like budgeting.

You have your allowance of carbs, fats, and proteins for the day, and it’s up to you to decide how to spend it.

Personally, I love new food experiences and trying cultural eats.

So, I take on the Lido with a “food is fuel” mindset, prioritizing micro-nutrients, whole foods, and protein.

And I save 20-30% of my budget as “fun funds” out in port.

(You can check out my blog Thefrugalfoodies.com and follow me on insta @the.frugal.foodies)

This approach makes me feel and perform my best while getting to fully enjoy new cultures free of food guilt because I trust my budget and know it works.

Rule #2: If You Booze, You Lose

The Cruise Ship Goal Buster: Cheap, plentiful alcohol.

The Cruise Ship Goal Booster: The occasional drink is a great way to socialize with the cast and crew without needing to spend a lot.


It’s pretty rewarding to sip on a bougie $3 cocktail by the pool in the middle of winter when just a year ago, you were lining up at 4 am for an open call.

It’s SO EASY to find yourself at the bar with tequila soda #3 sitting in front of you for the 3rd night in a row.

Booze is cheap, you don’t have to worry about how you’ll get home, and hanging out at the bar is a fun social outlet.

But excessive alcohol is going to take a toll on your goals.

Not only do liquid calories add up, but they also might encourage you to buy a bag of chips.

Or go up to late night at the Lido for a snack (that’s likely fried).

It also effs up how your body feels the next morning.

That hangover might make those pancakes and bacon extra tasty, and it might make you skip your gym session.

It also might make you sad, emotional, and feel unstable.

Here’s the thing, being social is fun, and there’s nothing wrong with the occasional drink.


Tips That Have Worked for Me to Fight the Booze Blues:

  • Sticking to/switching to sparkling water with a lime or a diet soda. It wards off those annoying, “Why aren’t you drinking?!?!” conversations that could peer pressure me into adding some vodka. It also gives my body time to register how I’m feeling.
  • Suggesting a game or movie night instead.
  • Surrounding myself with friends who are more likely to get up at 6 am for a day of exploring than closing the bar. This one is HUGE. Choosing an inner circle of people who share your ideals and have similar goals and habits make a world of difference.
  • Turning 29 years old…. The hangover just isn’t worth it!

Rule #3: Move Your Body to Stay a Bad Ass Hottie

The Cruise Ship Goal Buster: The more time you have, the less you get done.

The Cruise Ship Goal Booster: You have so much time! Create a movement schedule and stick to it.


In land life, you’re on the go, running from an audition to work, to class, and maybe even to the gym.

In ship life, it’s shockingly easy to stay in bed all day binging a tv show you snagged from someone’s hard drive.

“Get up and get moving!”

Lifting weights, moving your body, getting your heart rate up, and mobility is essential for your physical and mental well-being.

They are also important components of cross-training for avoiding injuries and tackling hard shows with ease.


Tips That Have Worked for Me:

  • Going to the gym at the same time every training day.
  • “Smart Girl” podcast walks on the outer deck (learning something new + fresh air + movement = a home run!)
  • Stairs > Elevator (My uphill endurance for challenging hikes has REALLY improved…just saying.)
  • Add in fun bonus movement sessions every week: give yourself a dance class.

Maybe your gal pal Allison is a yoga teacher. Perhaps you join the passengers for an AM spin class.

Remember… moving your body is supposed to be FUN.

“Move More, Drink Less, and Eat Smart.”

These are simple rules that will set you up for success. But, as you probably know, it’s not that easy.’


Here are two principles to help you stick to the rule book.

  1. Create Productive Habits Early, and Crush Your Goals; you Will do Surely
  2. Crushing your goals all comes down to creating sustainable habits.

If you aim to get more sleep, perhaps you create the habit of going to bed at 11 pm and waking up at 7 am.

If your goal is to get super strong, perhaps you create the habit of going to the gym at 4 pm every single training day.

If you aim to maintain your technique, perhaps you create the habit of warming up with a ballet barre before every show.

If your goal is to minimize stress, perhaps you create the habit of meditating every day for 10 minutes.

You get the picture!

Crash diets don’t work. And neither do crash habits.

Some gurus say it takes 21 days to form a habit; others say 66 days. One thing is clear: habits

don’t happen overnight. Take time to really pinpoint what habits you want to build, then add

them into your daily routine one at a time.

“Mindfulness is Key”

“Mindfulness” is one of those hot topic words that’s ironically thrown around in mindless ways.

However, once the meaning of being mindful clicked for me, I experienced so many positive changes in my life.

To me, mindfulness means having intention and being aware of what I say and do, and constantly checking in with myself by asking,

“Why am I doing/writing/posting/eating/drinking/etc. this and how does it serve me?”

Simple in concept but complicated in practice.

This fast-paced world throws overwhelming amounts of stimuli and information at us that disrupt the ability to be in tune with our bodies and minds.

It’s also easy to get caught up in doing things that we believe SHOULD serve us instead of assessing what things ACTUALLY serve us.


Ships are the perfect place to start being mindful of mindfulness.

There are fewer outside stimuli to pull you away from your original intention and more time to really think about and digest what said intentions are.

Plus, the internet tends to be slow, which means less social media scrolling.

Personally, this really helps me stop comparing myself to others to weed out those pesky “shoulds.”


Whether you’re at the gym, at the bar, in Lido, or hanging out with friends, take a second to

pinpoint your intentions and ask yourself, “Why am I doing this?” You’ll quickly realize what’s

serving you and what’s not.


Eat smart, move more, drink less, create productive habits, and do it all mindfully.

These principles will help you crush your ship goals so you can have an amazing contact and walk off that gangway feeling confident and ready to take on whatever is next.


xo

Katie

20 Conditioning Workouts for Dancers


I want to preface that this article  about conditioning workouts is written in outrage. Or rather, irritation.

With whom? Well, not at anyone specifically, but just in general, Over this misconception that “conditioning” workouts for dancers look like tuck jumps and burpees. 

Seriously, if you do a .5 second search, you’ll find: 

  1. Burpees, squat jumps, and reverse lunge to skips 
  2. 8 minute abs. A variation of crunches in every position, v-sits, and boat pose
  3. Some monster-mash hybrid move of a dancer balancing on a Bosu ball in a full penché while doing tricep kickbacks with 2 pound Bala bands… 
  4. Run a dance… then run the dance again… then again… then, oh the dancer has melted into a puddle on the floor? Better do some squats, push-ups, and planks before, you guessed it, running the number one more time. 

WHY GOD, WHY?!

So, before I share 20 Conditioning Workouts for Dancers, let’s define what conditioning is and, more importantly, what it is not. 


So What is Conditioning? 

DEFINITION:

Conditioning is a process in which stimuli are created by an exercise program performed by the athlete to produce a higher level of function. 

GOAL:

The goal of conditioning is to optimize the performance of the athlete and minimize the risk of injury and illness.” (1) 


In simple terms, conditioning workouts create an environment where the dancer or athlete is stimulated (challenged) to perform a higher level of function with the intended outcome of improved performance and reduced risk. 

In even simpler terms: Move better, risk less. 

This means, conditioning is NOT working out with the intention of getting sweaty and getting tired. 

It also means conditioning workouts should be thoughtful, intentional, targeted training. 

Most good conditioning workouts for dancers, like the ones you’ll see below, emphasize:

-Improvement on specific skills (height of a jump, length of a jump, quickness of an action) 

-Improved cardiovascular recovery time. I.e. helping an athletic artist lower their respiratory rate quickly. 

 Should you choose to implement conditioning training into your own or your dancer’s routines:

Conditioning workouts for dancers, when done properly, take a big metabolic toll on a person.

This means, they require a ton of additional energy. 

The conditioning workouts themselves are usually performed at a higher intensity, which requires more energy. 

AND, unlike traditional cardio like jogging or ballet barre, which of course also require lots of energy DURING the workout. Conditioning workouts for dancers require extra post-workout as well. 

That means they will tax one’s nervous system. 

Therefore, they will stimulate muscular adaptation. 

SO, a full-time, or even part time performer, should USE CONDITIONING WORKOUT SPARINGLY! 

Less is so much more.

Why? Because you need that energy for your dance technique classes, rehearsals, and especially on the stage! 

Therefore, you’ll also likely need to intentionally eat MORE food so your brain and body don’t dip into an energy deficit. But that’s a post for another day.


Hill Sprint Workouts For Dancers

Hill sprints are one of the most effective conditioning workouts for dancers on the planet. They are absolutely badass and have a host of benefits normal sprints don’t come close to matching. 

First, they are safer. 

It’s much harder to injure yourself doing hill sprints because you will never reach your maximum speed doing them. This workout in particular is so safe you can even do it after leg day without risking injury.

Secondly, hill sprints spread the training load across the legs. 

Whereas flat sprints will be overloading the hamstrings. While the hamstrings will still be getting their fair share of work, hill sprints encompass the glutes, lower back and calves. This makes post sprint recovery much easier. 

So if you take Einstein’s theory of gains into account (Gains = Intensity x recovery2) you have the ultimate winning scenario.

Also, hill sprints allow you to increase your sprinting speed, even though you’re training at sub-max speeds. Not only do hill sprints make your muscles more effective at actually performing sprints, they also perfect your technique.

Finally, if you’re a performer on a budget or traveling often, hill sprints can keep you strong and in shape for freeeee! 


1. The Super Sprint Conditioning Workouts 

Total Workout Time: ~17 minutes
Difficulty Level: Intermediate
Equipment Needed: Legs, a hill, and nerves of steel

First thing’s first: you need to find a good hill.

Some hills are great for building endurance, and others for strength and speed. We’re looking for the latter, so we have to be extra picky.

Your hill for super sprints should allow for a relatively quick but exceptionally difficult run. Ideally, the grade of the incline will be 25-35 degrees. This incline is ideal for both building sprint technique and developing power in the posterior chain.

The other factor is the length of the hill, which really translates into total sprint distance. 

Because of the steep angle, we want each individual sprint to be fairly short. Rather than have you measure a hill, which would be difficult and look strange, I’ll just have you measure by strides.

You want a hill you can crest by taking between ~15 and ~25 strides.

Don’t worry if it’s a bit shorter or a bit longer. The important thing is that you should be able to clear the hill from bottom to top in less than 10 seconds.

You’re going to be doing a lot of sprints, which will mean a lot of total work time, so we don’t want any single sprint to be too draining. 

On the other hand, if you can get from the bottom of the hill to the top in 10 steps or less, find a different hill. If there isn’t one that’s suitable, you can start your sprint about 8-10 strides away from the hill, “in the flat.” 

Make that part of your sprint.

Obviously, the only way to measure the number of strides it takes to conquer a particular hill is to test it.

So pick a hill and in the name of Merce Cunningham, run at it like you’ve got a swift 4 count to make it across the stage. It’s time to get to work.

Let’s get to work, b!tch

Set 1: 3-Sprint Combo

Sprint to the top of the hill and jog back down three times in a row, with no rest in between. After your third sprint, rest 30-60 seconds, and proceed to set 2.

Set 2: Stride Alternation Combo
  1. A) Short Stride Sprint – sprint up the hill taking short, choppy steps; almost as though you’re treating the hill like stairs. Get up as fast as you can, but try to make contact with the hill as many times as possible. Walk to the bottom of the hill.
    B) Long Stride Sprint – sprint up the hill taking the longest stride that feels comfortable. Your goal is to get up the hill with roughly 10% fewer strides than you have normally been taking. Walk to the bottom of the hill.
    C) Short Stride Sprint – sprint up the hill taking short, choppy steps; almost as though you’re treating the hill like stairs. Get up as fast as you can, but try to beat your number of steps from set A. Walk to the bottom of the hill.
    D) Mid-Stride Sprint – sprint up the hill using your typical stride length; however, try to increase your turnover rate. With the same stride length you normally use, focus on trying to increase your stride speed. Walk to the bottom of the hill.

Procedure: Perform A-D with minimal rest between. Take your time walking down the hill between sprints, allowing that to act as your rest period. After your last sprint (D), rest 30 seconds and proceed to set 3.

Set 3: 5 Single Sprints with Max Forward Lean

Sprint to the top of the hill while leaning forward as much as possible. Your stride should be slightly longer than average. When you get to the top of the hill, walk back down. Rest until you feel completely recovered. Repeat for a total of 5 sprints. After your fifth sprint, rest 30 seconds, and proceed to set 4.

Set 4: 4-3-2-1 Combo
  1. A) Sprint to the top of the hill and jog back down four times in a row, with no rest in between. After your fourth sprint, rest 60 seconds.
    B) Sprint to the top of the hill and jog back three times in a row, with no rest in between. After your third sprint, rest 45 seconds.
    C) Sprint to the top of the hill and job back down twice in a row, with no rest in between. After your second sprint, rest 30 seconds.
    D) Sprint to the top of the hill and jog back down. After your sprint, rest 60-90 seconds, and proceed to set 5.
Set 5: Strength and Speed Combo
  1. A) 10 push-ups
    B) Sprint to the top of the hill
    C) 10 push-ups
    D) Jog to the bottom of the hill
    E) 30-second push-up hold (at the midpoint)
    F) Sprint to the top of the hill
    G) 30-second plank
    H) Jog to the bottom of the hill
    I) 10 push-ups

Procedure: perform A-I sequentially, resting 10-15 seconds between each. After your last set of push-ups (I), rest 90-120 seconds and repeat set 5 a second time. 

The Epilogue 

All told, this conditioning workout will take just 17 minutes out of your day. But, just because the workout is quick and you’ll finish feeling relatively fresh, don’t go crazy and double the volume.

While this is truly difficult, if you’re not pushing beyond your capacity, this is a great stacker workout. That is, it’ll help make whatever you’re doing better—without interfering.

As a result, this workout is designed in such a way that you’ll be able to do these whenever you want or need, and still be able to make tremendous progress in your other programming AND step on stage the same night —because training for super speed doesn’t have to mean you can’t build super strength.


Jump Rope Conditioning Workouts For Dancers

I love jump rope workouts for dancers, a la Brooke Windam. 

Jump ropes are the ultimate tool for low-impact, accelerated fitness. 

Jumping rope doesn’t just get you whipped into shape, either. It  improves your athleticism, coordination and even builds a little muscle. 

You will get stronger, fortify bones and in time, be able to challenge the kids on your block to some highly competitive double-dutch.

(Plus, jumping and bouncing is even beneficial for lymphatic draining and hormone health!)

Anyway, it’s also a true, total body exercise. 

Focusing heavily on the arms, legs, abs, shoulders and chest there are few body parts you won’t hit while swinging that jump rope around. With all these muscles working together, jump rope develops elite levels of coordination, agility and athleticism.

The reason that jumping rope is one of the best workouts for dancers? 

You don’t have to go to the gym to get an awesome jump rope workout. 

All you need is a rope, a small space, yourself, and in no time you will be jumping your way to a body worth envy.

Again, this is super for the performer on a budget who doesn’t want to/ can’t spend $35 on a fitness class or has limited space in their NYC apartment or tour trunk.

The Workouts: 

For the jump rope workout, you’re going to be using two exercises. The Double Under, and the Runnin’ man. 

First, select your jump rope. Your rope should measure from the bottom of your foot to your armpit. 

Now that you’ve warmed up and have the right sized rope, it’s time to get after it.


2. The Double Under and Runnin’ Man

To get your mind and body connected and acquainted with the rope, jump rope easily for about 5 minutes or 200 jumps. This should not be exhausting, just jumping to get your heart rate going a bit. 

Rest 60 seconds after the 5 minutes of jump rope. 

For this workout we’re going to alternate between two exercises. Double Unders and the Runnin’ Man. Alternate between these two guys and prepare to get sweaty. 

A1) Double Under – 10 reps

Rest 15s

A2) Runnin’ Man – 30 seconds

Rest 45-60 seconds.

Alternate between A1 and A2 for 10-15 minutes. 


3. Total Body Jump Rope Conditioning Workout:

Set a timer for 3 minutes.

Alternate between exercises with as little rest as possible.

A1) Two-footed Jumps – 20 reps

A2) Right Foot Jumps – 20 reps

A3) Left Foot Jumps – 20 reps

A4) Bodyweight Squats – 60 seconds

Rest 45 seconds and proceed to set B.

B1) Two-footed Jumps – 20 reps

B2) Right Foot Jumps – 20 reps

B3) Left Foot Jumps – 20 reps

B4) Pushups – 60 seconds

Rest 45 seconds and proceed to set C.

C1) Two-footed Jumps – 20 reps

C2) Right Foot Jumps – 20 reps

C3) Left Foot Jumps – 20 reps

C4) Alternating Jump Lunge – 60 seconds

Rest 45 seconds and proceed to set D.

D1) Two-footed Jumps – 20 reps

D2) Right Foot Jumps – 20 reps

D3) Left Foot Jumps – 20 reps

D4) Plank – 60 seconds

Done! Now it’s time to take all of the rest. Don’t forget to make pretty sweat angles on the pavement.


Battle Rope Conditioning Workouts For Dancers

conditioning workouts with ropes

Having recently indulged in the world of Sarah J. Maas’ “A Court of Silver Flames” I imagine myself training alongside the fae of the Valkyrie when I see battle ropes (if you know you know…if you don’t know, well I can’t explain why fairy smut and conditioning workouts are linked, but just trust me)

ANYWAY

It’s time for battle and the rope is your weapon. This time, the enemy is yourself and your will.

Not simply a novel fitness fad; battle ropes are a ruthlessly effective, total body workout. 

If you’re a dancer who has ever said “I just don’t have strong arms” these ropes will get you stronger and leaner than you ever thought possible. 

There is no skill level barrier, all you need to do is pick up some high quality battle ropes and do one of the workouts below. 


4. Behind Enemy Lines

The workout here is simple. 3 exercises performed for 30 seconds with a 30 second break in between. 

A1) Alternating Waves – 30 seconds

Rest 30 seconds

A2) Double Arm Waves – 30 seconds

Rest 30 seconds

A3) Double Arm Waves – 30 seconds

Rest 60 seconds and repeat 4 times.


5. The Warrior Rope Workout:

A1) Warrior Slam (left side) – 15 reps

A2) Diagonal Slam (left side) – 15 reps

A3) Warrior Slam (right side) – 15 reps

A4) Diagonal Slam (right side) – 15 reps

Alternate between each exercise with no rest after each one. Rest 60s after A4 and repeat 4 times.

B1) 1-arm Plank Waves (left arm) – 15 reps

B2) Kneeling Plank Waves – 15 reps 

B3) 1-arm Plank Wave (right arm) – 15 reps

B4) Spread Eagle Waves – 15 reps

B5) Hip Toss – 10 reps each side

Alternate between each exercise with no rest after each one. Rest 60s after B5 and repeat 2 more times.


6. Single Arm Destruction:

A1) Single Arm In and Out Waves (left side) – 15 seconds

A2) Single Arm Circles (left side) – 15 seconds

A3) Single Arm Waves (left side) – 15 seconds

A4) Single Arm Slams (left side) – 15 seconds

Rest 30 seconds

A5) Single Arm In and Out Waves (right side) – 15 seconds

A6) Single Arm Circles (right side) – 15 seconds

A7) Single Arm Waves (right side) – 15 seconds

A8) Single Arm Slam (right side) – 15 seconds

Perform each exercise for 15 seconds. Rest for 30 seconds only after each exercise is complete on each arm. Rest 90-120 seconds after A8 and repeat 3 more times.


Kettlebell Workouts For Dancers

kettlebell workouts for dancers

Admittedly they can be a bit intimidating. I mean, they look like someone ransacked a pirate ship and said “oh, leftover cannon balls? Let’s start a fitness trend!” 

But they don’t need to be scary and, in fact, can actually be really empowering! Kettlebells are simply a tool and a super effective one at that. 

Swing this cannonball around you’ll start seeing radical improvement in power, explosive strength, and stamina!

Here is where Kettlebells are different.

Not only are they one of the most effective conditioning tools you can use, but they begin to remedy a lot of the damage our modern lifestyle imposes on us. Like sitting at a desk all day and typing on a computer (like I am doing right now) absolutely wrecks your lower back and shoulders.

Kettlebell movements, when done properly, can undo a lot of that damage. 

PLUS, when applied to our dancing, that means strong backs, engaged abs, and structured glutes for better partnering, lifts, turns, port de bras, jumps, traveling across the floor, transitioning levels… everything really!

7. Swing ‘Till You Drop:

To set up, you’re going to need a Kettlebell that is moderately heavy and a timer.

For “moderately heavy” start with a weight that is 15-30% of your body weight.

Set the timer for 10 minutes. 

Walk up to your kettlebell of choice and hit start on the time.

Now you’re going to swing your ass off for those 10 minutes. And by ass I mean hands because good luck trying to hold on to anything after this workout. 

Only stop swinging when your form starts to degrade. Complete as few sets as possible in those 10 minutes.

Once your time is up, record the number of reps on your best set and total reps you did and try to beat that next time you do this workout. 


8. Defying Gravity

A1) Kettlebell Clean – 15 reps

A2) Kettlebell Squat to Press – 15 reps

Set a timer to continuously run. Every minute on the minute perform these two exercises back to back. Your rest period will be the time remaining for that minute. Repeat for 15 minutes total. 


9. Down and Dirty KB Complex

A1) Single Arm KB Snatch– 5 reps each arm

A2) Single Arm KB Clean – 5 reps each arm

A3) Single Arm KB Swing – 10 reps each arm

A4) Single Arm KB Squat (front loaded) – 10 reps each arm

Do not rest between exercises. Perform all reps on one side first, then switch to complete the exercise. Rest 90-120 after A4. Repeat 4 times.


Sled Workout

sled push conditioning workout

The sled needs more love. This sucker is going to make you look amazing, improve your conditioning and your strength. 

If there was only one thing I could do at the gym, pushing the sled would be it. It’s that great.

Sleds are just beginning to gain traction in local gyms, but they have been popular on the gridiron and silver screen for a while now. 

Every high school football team has used this one-of-a-kind tool to build speed, power and improve their conditioning. Every time I watch Remember the Titans  I want to go run outside and push the sled around immediately. (Obviously singing “We are the Titans” while doing it.)

Few conditioning tools will give you the same training effect as the sled. Because sled training will challenge you in ways you’ve never been challenged before. Great part is the set-up is easy, just make sure you bring your “A” game and you will be rewarded.


10. The Beginner Sled Workouts

Load up the sled with the equivalent of your bodyweight. 

Push it as far as you can. 

If you’re in a gym that’s going to be on the end of the floor/turf. 

If you have the luxury of being outside, put it to the end of the parking lot or designated area. Just be sure you are pushing a minimum of 10 steps.

Then, rest for 45 seconds and push it back to where you started. 

Rest 45 seconds again and repeat the total circuit 3 times for a total of 6 circuits.

There is an interesting phenomenon when using the sled called the “sled flu.” 

This essentially means you might puke or feel a bit sickly. Not to worry, it’s happened to the best of us. 

Note: if you are pushing on rubber instead of turf, load the sled with half of your bodyweight. You know, cuz friction.


11. Push, Pull and Cry

The set-up: Load up the sled with the equivalent of your bodyweight. This is upper body heavy so feel free to round down if that isn’t your strong point or you’re in an upper-body dominant show.

Next, make sure you have something to pull the sled with like a TRX attachment.

A1) Sled Chest Press – 20 steps

Step into the sled, maintain a good forward lean and back position. Then chest press the sled forward, like you’re doing a cable chest press.

A2) Sled Row – 20 steps (or until you reach the starting position)

With the TRX or other attachment row the sled back to the starting position. Be sure to sit down into a good “athletic” position, lean forward a bit and row explosively. Step back until there is tension on the TRX and repeat until you’re back where you started.

Rest 1-2 minutes after A2. Repeat 3 more times.


12. Sled Total Body Workout

Load sled with your bodyweight and attach a battle rope to the sled.

A1) Sled Push – Length of Turf (20 steps minimum)

A2) Push-Up – 20 reps

Sprint back to where the rope starts

A3) Sled Rope Pull – Back to starting position

A4) Plank – 60s

Remove 1 plate or 45#’s from the sled. Rest 1-2 minutes after A4. Repeat 4 more times, removing a plate each time. As you remove weight try to sprint faster each round on the sled push.


Beach Sprint Conditioning Workouts

conditioning workouts

If you’re a NYC-based performer, beach sprints might not be accessible year round…BUT! If you’re on tour, at a regional theater, or just on vacation and want to get in an incredible workout these should be top of the list.

Beach sprints are amazing conditioning workouts for dancers and not just because they make you feel like the ensemble in Mama Mia with their snorkels and flippers! Because of the nature of running in sand, beach sprints will strengthen your ankles, calves and improve your coordination…and the not quite solid sand makes them much harder. 

Doing this will make you stronger, faster and more athletic than normal sprinting would. 

Bonus, the slightly unstable surface makes those abs work overtime.

TLDR: Beach sprints make you better at life, give you strong sexy legs, untwistable ankles, and strong abs.

To that effect, here is the workout you need:

Pace out 50 yards and mark it. That’s going to be about 50 normal stride steps or 40 really long stride steps.

Then, do the same for 40 yards and 20 yards.

Now that that is done, it’s time to sprint. 

Note: make sure you have warmed up really well before this.


13. Sprint away

A1) Sprint 50 yards

Rest 30 seconds

A2) Sprint back to the start position

Rest 60 seconds

Repeat this 3 times. After your last rest period proceed to B1.

B1) Sprint 20 yards.

Walk back to the start (this is your rest period)

Repeat 3 more times. After your last sprint proceed to C1.

C1) Sprint 40 yards

Rest 30 seconds

C2) Sprint back to the starting position.

Rest 20 seconds

C3) Sprint 20 yards.

Walk back to start

Repeat 1 more time. After your second sprint circuit, rest for 60s and proceed to D1.

D1) Sprint 50 yards

Walk back to start

D2) Sprint 20 yards

Walk back to start

Rest 45 seconds. Repeat one more time.

Aaannnnd done. 


Tire Conditioning Workouts For Dancers

When I say that the gym can be one of the most empowering places for performers and people, I mean it! There are very few pieces of equipment that just make you feel strong and powerful. 

A heavy ass tire is one of those. 

Originating from strongman events, the tire flip harkens back to a time when life was a bit simpler, a bit primitive, and a bit harder.

Hard times breed hard people. Hard exercises, like the tire flip, creates powerful and sturdy bodies. As with most things, the simple workout is the most effective. 

Before we start just flipping tires around, let’s make sure you do this right. 

Tire flips are seemingly easy but normally done disastrously wrong. 

A tire flip is not a deadlift.

You should set up in front of the tire in a “jazz seconde” stance. Then, place your feet about shoulder width in a “jump” stance, chest up pushing into the tire. Finally, your arms should be stretched out wide with your back nice and arched.

To start the lift, drive your hips and chest into the tire and push up at about a 45 degree angle. You are not using your arms during this lift, they are just holding the tire. 

Your hips are going to be doing all the work here. 

Once the tire begins to move up you want to continue to drive your hips into the tire, very much like you are doing a clean. In fact, if your feet leave the ground doing this you know you are doing it right. 

Protip: Use one of your knees to assist the tire up, then duck under and catch the tire, just like the end of your clean.

At this point, drive the tire up with your legs and use that momentum to push the tire over. Do not curl the tire up, use your hips and legs to drive it up. Keep that back straight and explode through the movement.

Now, here is the only tire workout you will need.


14. Tire Training

  1. Set a timer for 60 seconds
  2. Flip tire as many times as possible
  3. Record number, this is your “max” for this month


15. Tired & true

  1. Perform 75-80% of your max flips in 60s.

Rest 60-120s

Note: Round to the nearest low number. (if you can do 10 reps and its 75%, do 7)

  1. Perform 50% of your max flips in 45s

Rest 90s

  1. Perform 40% of max flips in 30s.

Note: If you can’t get the appropriate # of reps in 30s, Terminate set.

Rest 90s.

  1. Perform 150% of max flips in 2 min.

If you cant get the prescribed reps, terminate set. 

Rest 60s.

  1. Perform AMAP (as many as possible) in 30 seconds

Rest 120-180s.

  1. Perform AMAP (as many as possible) in 60 seconds. Record reps.

And that’s a wrap. Make sure to send me pictures of your sweat angels ☺.


16. Tire/Hammer Workout

Now, not all of us are blessed with a tire that weighs 100 pounds or more. 

If you don’t, it really isn’t worth it to flip for a workout. 

So what do you do? Add a club, mace or sledgehammer and literally hammer the fat away. 

Grab your hammer/mace and step up to the tire

A1) Single Arm Hammer – 20 seconds per arm

No rest between arms. Rest 60 seconds and move to set B.

B1) Single Arm Hammer – 30 seconds per arm

No rest between arms. Rest 60 seconds and move to set C.

C1) Single Arm Hammer – 10 seconds per arm

No rest between arms. Rest 30 seconds and move to set D.

D1) Single Arm Hammer – 15 seconds per arm

No rest between arms. Rest 60 seconds and move to set E.

E1) Single Arm Hammer – 30 seconds per arm

No rest between arms. Rest 60 seconds and move to set F.

F1) Single Arm Hammer – 20 seconds per arm

No rest between arms. Rest 30 seconds and move to set G. 

G1) Single Arm Hammer – 10 seconds per arm

No rest between arms. Rest 20 seconds and move to set H. 

H1) Single Arm Hammer – 10 seconds per arm

No rest between arms. Rest 20 seconds and move to set I.

I1) Single Arm Hammer Swing – 30 seconds per arm.

And curtain. 

Complexes

This is one of my favorite conditioning workouts for dancers. 

Doing a complex will likely exhaust you. But it will also affect your total work capacity, power output, and stamina when fatigued. In other words, it will help you stop wheezing in the wings lol

All you need is a barbell and an optional load, roughly 40-65% of your bodyweight. 

The goal behind this workout is to do each exercise continually without setting the weight down. Instead, just go back to back into each exercise and only rest once the whole complex is complete. 


17. Here is my go-to complex:

  1. Hang Clean
  2. Front Squat
  3. Push Press
  4. Bent Over Row/Romanian Deadlift Combo
  5. Reverse Lunge (with the barbell in the front squat position)

Do each of these exercises 8 times (that’s 8 times each leg on the reverse lunge). Again, go through all the exercises without resting. Once complete, rest 2 minutes and repeat 3-5 times.


Stair Conditioning Workouts

stair workout for dancers

Stair sprints are one of the best ways to get cardio in, especially in a big city. Living in my 5 story walk-up in NYC, this was my go to method in the dead of winter when I didn’t feel like leaving my apartment.

You don’t have to do this in an apartment building, the local high school stadium or any stairs really will be just fine. 

Or the park.

Or, this was super convenient when I was working on cruise ships! 


18. Stairs are everywhere. 

Start here with set 1: Sprint to the top of the stairs and come back.

Second set: Sprint to the top of the stairs and come back x 2 (no rest between).

Set 3: Then, sprint to the top of the stairs and come back x 3 (no rest between).

Set 4: You’re sprinting again! Sprint to the top of the stairs and come back x 4 (no rest between).

Set 5: Keep going! Sprint to the top of the stairs and come back x 4 (no rest between).

Set 6: Sprint to the top of the stairs and come back x 3 (no rest between).

Set 7: You’ve got this! Sprint to the top of the stairs and come back x2 (no rest between).

Set 8: Last one! Sprint to the top of the stairs and come back

Rest 30-60 seconds between sets, but, as noted, not between sprints. Your rest period then will be coming back down. Between sets 5 and 6 I recommend taking about 90 – 120 seconds of rest.


Bike Sprint (HIIT) Conditioning Workouts

bike sprint workout for dancers

Interval training is amazing, but High-Intensity Interval Training (HIIT) also puts enormous stress on the fast-twitch muscle fibers. This results in the fibers becoming more metabolically efficient, allowing your body to rely on fat for fuel as well as developing greater lactic acid tolerance.

Not only are you getting leaner, but you’re getting faster and stronger.

As I mentioned at the start of this article, interval training has an “afterburn” effect. 

Because of a phenomenon known as EPOC (Excess Post-Exercise Oxygen Consumption) HIIT not only burns a lot of calories during exercise, but it keeps your metabolic rate elevated for an extended period of time – up to 48 hours

So, why doesn’t everyone just do HIIT all the time? It’s hard and physically demanding. But you, you’re ready for that. You’re ready to start dropping fat at an exponential rate.

 And for this workout, we’re going to accomplish that with bike sprint intervals.

Bike sprints are great. That’s because are easy to do (there is usually some type of bike at every gym in the world), easy on the knees and there is very little skill involved so anyone can do it. Therefore, if you’re a little banged up from your training or just life in general, bike sprints are a great way to get moving… without really having to move much.


19. Here is a quick 12 minute bike HIIT for you. 

Warm Up with 4 minutes of moderate pedaling on the bike

For the sprint period, you need to sprint all out. Try to work in a “9” range of effort. For the rest periods you are going to still be pedaling but It’s going to be nice and easy. Ready?

Sprint 30 seconds.

Rest 15 seconds.

Sprint 45 seconds.

Rest 15 seconds.

Sprint 45 seconds.

Rest 45 seconds.

Sprint 30 seconds.

Rest 30 seconds.

Sprint 15 seconds.

Rest 30 seconds.

Sprint 60 seconds.

Rest 60 seconds.

Sprint 30 seconds.

Rest 60 seconds.

Sprint 30 seconds.

Rest 30 seconds.

Sprint 30 seconds.

Rest 60 seconds.

Sprint 60 seconds.

And that’s that. Remember, you are determining how hard it is. 

If you can’t go full out for 60 seconds that’s ok, slow it down a bit and crush your next set.


Bodyweight Circuit Conditioning Workout For Dancers

workouts for dancers

Sometimes it happens. 

You travel, tour in different cities, change jobs and just don’t have a gym membership for a while. Maybe it’s a couple days, maybe it’s a few months. 

Do you stop working out?

Heck no! You stay lean, muscular, and in tip-top shape by doing bodyweight circuits. 

Sure, it’s not as exciting as deadlifting serious weight or pushing 200 plus pounds around on the sled. 

It may not be flashy but it can be just as effective as keeping you in shape. 

With the right workouts for dancers, you can stay fit anywhere. Because, hotel room, bedroom, it doesn’t matter; all you need is a bed and a little bit of space and you have everything you could possibly need.

In that case, for all of you who are pressed for time, space, or just don’t have access to a gym, I’ve got you covered:


20. Bodyweight Baddie

Prisoner Squat x 20.

Push-Up x 20.

Bulgarian Split Squat w/ foot on bed or chair x 10/leg.

Push Up Position Plank x 45 seconds.

Duck Under(lateral squat) x 20/leg

Chair Row x 20

Side Plank x 20s/side

Rest 15 seconds between each exercise. Repeat this 4-6 times. Rest 60-90 seconds between each circuit.

Boom! Now you can get your conditioning done anywhere. No more worrying about losing progress no matter what your situation is.


Conclusion

You now have some tools to get into the best shape of your life. 

Each and every one of the workouts for dancers here will push you to your limits, physically and mentally. Conditioning is not easy, if it was everyone would be walking around shredded and confident. 

It’s important to know, as a performer, your conditioning workouts should be goal-oriented. They should feel athletic (since you ARE an athlete). Conditioning workouts should leave you tired but not wrecked. And, finally, they should leave you feeling stimulated, but not crippled with soreness.

Cross training can look very different for different people with different goals but like we always say… if it looks like dancing, and it feels like dancing… it’s probably not cross training- it’s dancing. 

Tag us when you try these workouts for dancers!

xox Am 

PS if you want to work with a pro-dancer/ certified personal trainer who can make tailored training, nutrition, and recovery plans for you you should check-out our 1:1 coaching program The Embodied Artist Academy

  1. https://www.aafp.org/dam/AAFP/documents/patient_care/fitness/ACSMconditioningofathletes.pdf
  2. Herman, L., et al. “Validity and reliability of the session RPE method for monitoring exercise training intensity: original research article.”South African Journal of Sports Medicine 1 (2006): 14-17.
  3. Cole, Christopher R., et al. “Heart rate recovery after submaximal exercise testing as a predictor of mortality in a cardiovascularly healthy cohort.”Annals of internal medicine 7 (2000): 552-555.
  4. Hill, E. E., et al. “Exercise and circulating cortisol levels: the intensity threshold effect.”J Endocrinol Invest 7 (2008): 587-91.

Special thanks to the co-author of this article Christopher Coulson of Nerds Who Lift.