fast workout, fast workout for dancers, workout for dancers, dancer workout

Workout Wednesday: The Fast Workout

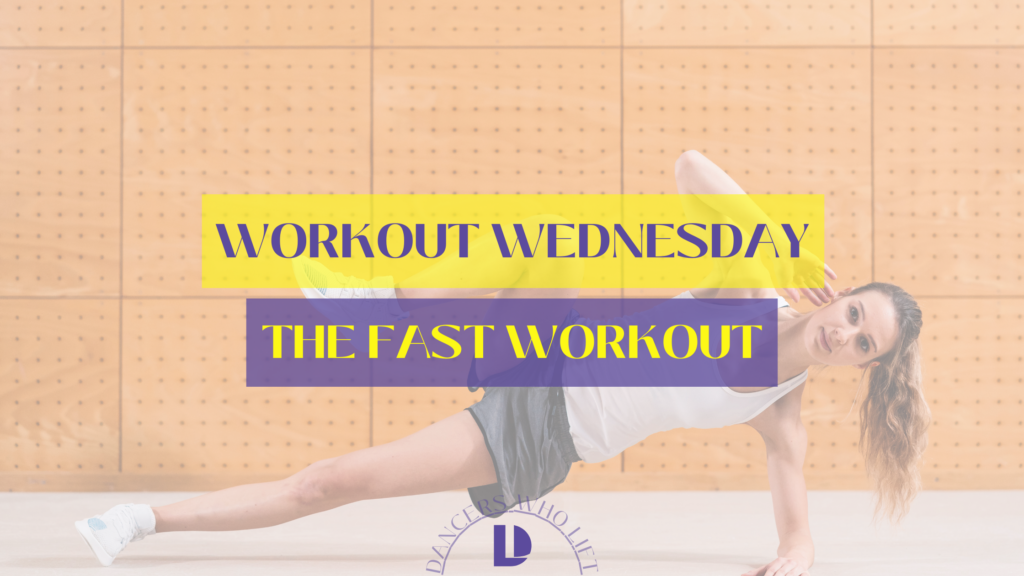
Welcome back to Workout Wednesday! Today we are challenging you with a fast workout. This workout clocks in at about 12 minutes, making this the perfect sweat session when you need to get your workout in quickly. 

But before you think you’re getting off easy, think again. The trick to this workout is that there are no rests. 

That’s right. You’ll perform this fast workout circuit five times straight through without taking a rest. 

You ready?


personal training for dancers,online personal training, resistance training for dancers


The Fast Workout

Bicycle crunch x 8/side

First up in today’s fast workout is the bicycle crunch!

Lay on your back, with your knees bent. 

Engage your core,  by imagining your bottom rib is trying to reach your hip bone. This should result in your ribcage knitting closed and your abs pulling back and up. 

Next, place your arms behind your head, elbows wide to the side. 

Now, using your abdominals, lift the shoulder off the ground. 

From here, lift your left knee and twist your shoulders to try and touch it with your right elbow. 

Keeping your shoulders lifted and elbows wide, switch sides. 

*Perform a total of 16 reps (8per side) then, immediately move on to the next exercise.*


Negative Push-ups x8

Also known as eccentric push-ups, this exercise is a great way to build strength even if the entire push-up  is still a bit too challenging for you. 

Set up in a push-up position on the ground with legs extended like you are doing a plank.

Keeping the core actively engaged, lower as far down as you can with control, then you can put your knees down and return to the starting position.

*Repeat for a total of 8 reps then immediately move on to the next exercise.*


Side Plank with Crunch x8/side

Ahh the side plank with crunch a double whammy!

Set yourself up into a side plank and extend your top arm so it’s parallel with your ear.

Then, without tipping your hips, crunch your top leg and top arm toward the center of your torso.

Finally, shoot them back out to their starting position.

*Perform 8 reps on each side, then immediately move on to the next exercise.* 


Single Leg RDL x6/side

Okay, this next exercise can be done as a bodyweight exercise, with a resistance band, or with a dumbbell. If you choose to use a weight, ensure your form is rock solid to avoid injury and get the most out of the exercise!

For the single leg RDL stand with one leg slightly behind the other. (If you’re using a weight, hold the weight in the same hand as the back leg.)

Then, slowly hinge from the hips, allowing the back leg to lift while the standing knee stays over the ankle.

The weight should slowly skim your shin.

Finally, press your hips forward to return to standing. 

*Perform 6 reps on each side, then immediately move on to the final exercise of the circuit.*


Fast Jumping Jacks x15

Okay we’ve reached the end of our no-rest, super fast workout and you might think “I know jumping jacks!”

But, when you do your jumping jacks I want you to actually do jumping jacks.

Visualize your arms like wings. Spread them on the up then, visualize your lats pulling them closed on the down. Doing jumping jacks like this will engage your back and, as a result, get your entire core working. 

Do this quickly, emphasizing the “in” portion of the jacks – these aren’t your 10th grade gym class jumping jacks, these are quick, intentional jumping jacks designed to get your heart rate up!

*Perform 15 fast jumping jacks before immediately restarting the circuit.*

Finish it up!

To finish the workout you must complete five rounds of this workout. Ideally you shouldn’t take any rest time throughout this workout — yes, this will slow your pace down, but you can do it!

When you finish, take about five minutes to cool down. This can be a short walk or mobility session. 

Then pat yourself on the back and leave knowing you’ve given your body everything it needs in under 20 minutes.


Want more workouts like this? Tune into this blog every Wednesday for another free workout! Can’t wait that long? Check out these workouts and fitness tips: What is a Drop Set and Why Should I Try It?, 1.5 Times: A Time Under Tension Workout, What is a Rest Day? The Key To Unlocking Your Progress


what is a drop set, how to do a drop set?

What Is A Drop Set And Why Should I Try It?

Now that you’re consistently in the weight room, you’re likely hearing some lingo you might not be familiar with. You got sets, reps, and supersets down. But what is a drop set?

Don’t worry, despite it sounding intimidating, drop sets are a great tool for maximizing your time in the gym. 


Why Drop Sets?

Studies have shown that there isn’t much difference in hypertrophy between drop sets and traditional weight training sets. However, that same research shows that drop sets can take as little as half the time in the gym. 

The reason? Because drop sets are all about training to failure and training to failure is shown to lead to maximum hypertrophy gains. 

So, want to learn how to reach failure faster, maximize your muscle gains, and get in and out of the gym in no time?

Follow along. 


What Is a Drop Set?

A drop set is a resistance training technique that has the lifter perform as many reps as they can with good form until their muscles fatigue, or they can no longer maintain proper form. 

Once they fatigue out, they immediately lighten the weight and perform the same exercise to fatigue again, without resting between weight changes.


personal training for dancers


How to Perform a Drop Set

So you’ve gone from “what is a drop set” to wanting to try one? Good!

First, choose a weight that’s appropriate for about 6-12 reps.

Then, perform as many reps as you can until you start to fatigue or lose your form. 

Immediately drop the weight. Keep in mind, that the more weight you drop, the longer it will take you to fatigue out. 

I recommend dropping the weight no more than 20% between sets. You’ll immediately perform as many reps as you can before you fatigue or start to lose form. Do not rest between sets. 

You’ll then, drop the weight by about 20% one more time and start your reps over again. 

You’ll likely feel fatigued at this point, but if you’re up for it, drop the weight a third time. And, after this set, you’re done! 


Things to Keep In Mind 

Performing more than four sets (three drops) has been shown to yield no additional benefits so keep your drop sets to four sets tops! Keep this in mind when choosing your weight.

Because drop sets are such high intensity, it’s recommended that you keep to only 1-2 drop sets within a workout. 

Otherwise, drop sets are a perfect tool to add to your arsenal when you want to push yourself in the gym.

So, do you think you’ll try a drop set next time you hit the weight room? Let us know if you do! We want to hear all about your lifting wins!  And if not, walk into the weight room confidently, knowing if someone asks you “Hey, what is a drop set?” you know exactly how to respond.

Want more fitness tips to keep you feeling confident in the gym? Check out these quick reads: Visualization and Manifestation: The Secret to Achieving Goals?, How to Do a Proper Deadlift: The Ultimate Guide for Dancers, Leg Day: Perform At Your Own Risk

Workout Wednesday: The Isometric Workout

An isometric workout is an excellent way to promote muscle growth. In fact, some studies have shown that isometric training proved to produce greater muscle hypertrophy than traditional exercises. The best part of an isometric workout is the fact that it’s shown to result in less fatigue than traditional dynamic strength training. 

A workout that results in big strength gains without exhausting your body? Sign us up!

The Isometric Workout

Today’s workout is focused on exercises you know and love but adding an isometric element.

You’ll need appropriate weight dumbbells (or other weighted object) for bicep curls and rows, two towels, a water bottle, and a mat.

You will also want a way to time yourself as this workout is an AMRAP (As many rounds as possible within a give amount of time)

This isometric workout is circuit style. So, complete the entire circuit before stopping to rest. 

That said, it’s a good idea to read through this isometric workout before you start your timer so you can get the most out of your session!

Ready? Let’s dive in.


Free 5 Day Turn Course dance workout


Iso Rows x 5 x 5sec

First up in our isometric workout are isometric rows! 

For this exercise, stand with your feet hip width apart, holding your weights in your hands. Soften your knees and hinge your hips backward, almost like you’re setting up for a deadlift. Make sure you’re bracing your core to  prevent your lower back from arching.

From this position, pull the weights back, toward your pockets-not your chest! 

Here is where this becomes an isometric workout – hold the weights here for five full seconds. Then, slowly return them to their starting position. 

Remember to keep your shoulders down and don’t let your back arch!

Perform 5 reps. 

Diamond Push-ups x5

This is the only exercise in our isometric workout that does not, in fact, utilize an isometric hold. 

Instead, simply set yourself up into a push-up position. However, instead of placing your hands by your armpits, make a diamond shape with your pointer fingers and thumbs; centering your hands underneath your chest. 

These are HARD so, if your range of motion is smaller that’s okay! You’ll get stronger. If you need more stability, or if these are too challenging, try widening your stance by spreading your feet apart. 

Perform 5 push-ups in this position. 

Again, remember to keep your shoulders down!

Iso Curls x 5 x 5 sec

Alright, next up is isometric bicep curls. There are a few ways to do this exercise but today we’ll work both arms simultaneously.

Once again, stand with your feel hip width apart, holding your weights in each hand.

Next, keeping your arms glued to your sides, curl the weight up toward your biceps. As your lower the weights back down, pause when your arms are at a 90 degree angle.

Hold here for 5 seconds, then slowly lower the rest of the way down. 

Perform 5 reps. 

Towel Squat and Raise x10 x 3 sec

Okay, we’ve reached the final exercise in our isometric workout!

Grab your two towels by one end with one in each hand. Next, step on the ends of each towel so the towels go from under your foot and up the outside of your body. 

Squat down as low as you can, keeping your feet planted on the towels. Now, adjust your grip on the towels so there is only a little slack. 

From here, press your feet into the ground and press upward, as if you were trying to stand. The towels will restrict your movement. 

When the towels are taught, hold this position for 3 seconds, then release back down. 

Perform 10 reps.

Finishing the Isometric Workout

Once you’ve completed the circuit rest for 30 seconds then start the circuit over again. 

The goal is to perform as many rounds as possible within 15 minutes. 

So, set your timer, it’s time to get to work!


Did you enjoy today’s workout? Tune in every Wednesday for a new free workout. But don’t worry, we’ve got plenty to catch up on if you don’t want to wait until next week. Read: Why Should Dancers Lift Weights?, Making a Split Decision: Tips and Tricks on How to Get Your Splits, Stability Burn: A Dumbbell Workout

dumbbell overhead pullovers

Training Tip Tuesday: Dumbbell Overhead Pullover

Hey, Hey! Welcome to another Training Tip Tuesday! Today we are talking about a dumbbell overhead pullover!

 Who doesn’t love an exercise that works two different muscle groups at the same time?!?!?

The dumbbell overhead pullover causes a ruckus in the fitness world with much debate over whether it’s a back or chest exercise!

The truth? It can be both!

During a dumbbell overhead pullover, the front of the chest is controlling the pushing movements, while the back powers the pulling movements.

Your Lats assist in moving the muscles, while releasing the DB overhead requires more help from your chest.

That’s why this is one of my favorite chest exercises– because you feel it in your chest, back, shoulders, and core!

Why is this a good thing? Other than a providing a great workout, this compound exercise helps improve your full body stability – an excellent mode of training for any dancer.

So let’s get into it shall we?!


Free 5 Day Turn Course dance workout


How To Perform The Dumbbell Overhead Pullover 

This exercise can be done on a bench or laying on a weight bench.

While doing this exercise we want to make sure we are emphasizing the engagement in our pecs through the whole exercise and not overextending the low back at any point in this exercise.

The Set Up:

You can perform this exercise on a mat or on a bench. 

If sitting on a bench, place your feet comfortably on the floor, straddling the bench. Hold the dumbbell with two hands, holding the weight by the one of the bulbous ends rather than the handle. Your hands should create a triangle shape to cradle the weight.

Next, lie back so that your back, neck, and head are fully supported on the bench.

If using the floor, lay on a flat surface with your knees bent and feet planted on the ground for stability. Everything else about the set up remains the same

The How To:

Extend your arms above your chest, holding the weight with your hands. Your arms should form a sort of triangle with your chest as the base. Keep your elbows soft while maintaining a nice straight line. This helps us not overextended our joints and control the weight a little bit better.

Next, keeping your shoulders down, reach the weight back over your head so your elbows are by your ears. Inhale keeping a strong back and core- you don’t want to let your ribs hyperextend! This keeps your lower back supported!

Take your time (about 3 to 4 seconds) to reach a fully extended position where the weights are behind but not below your head.

Finally, exhale slowly and return your arms to the starting position, bringing the weight right back over your chest. Hold the starting position for a second before beginning again.

Having a hard time visualizing it? Check out this video from Coach Melody to get the full visual breakdown!

 Wrap it up

And just like that you’ve learned how to do a dumbbell overhead pullover. Unlike skull-crushers, these target a large group of muscles and work your shoulder joint through a large range of motion.  If you have cranky shoulders, it might be wise to warm up well before performing this exercise!


Want more Training Tips? Check out these quick reads for more gym hacks, nutrition tips, and game-changers for dancers: Snacks on Deck: Everything You Need to Know about Eating Before A Workout, Training Tip Tuesday: Smith Machine Hip Thrust, A Dancer’s Guide to Managing and Preventing Knee and Ankle Pain

seasons of life call for different types of training

Training Through The Many Seasons of Life

As much as we’d love to live in a world where we are always booked, can take as many vacation days as we please, and are always at the peak of our health journey, the reality is, that there are many different seasons of life. 

There are seasons when we are so busy we can hardly think straight and return home at the end of the only to collapse into bed. 

There are seasons when you’re recovering from an injury and days are filled with eating for recovery, going to physical therapy, and resting. 

Seasons when life is in one of those beautiful states of balance and you’re able to take on commitments and challenges that you previously didn’t have the bandwidth for. 

And there are seasons when you are booked in a show, rehearsals filling your days and shows filling your evenings. 

Each of these seasons of life takes a different type of toll on your body. Observing that toll and planning your physical training around it will be the key to consistency in your active life. 

So, how do we tailor our training to these seasons of life?

I’m so glad you asked, let’s dive in. 


Why is This Important

As much as we dancers want to believe we are superhuman, we are not. The truth is, there is only so much stress (physical/emotional/spiritual/mental) that our bodies can handle at one time.

In fact, studies have shown that seasons of life that involve high amounts of stress impair efforts to be physically active. 

In other words, when we are stressed, it’s harder to get ourselves to the gym and the reason isn’t just laziness, it’s physiological. 

Remember, our bodies want us to win. If we are experiencing a stressful season of life, our bodies will signal us to take it easy so it has time to recover. 

Now, this is challenging because, dancers love to do things.

That’s why we talk so often about stress management.

Because even if you don’t feel stressed. That doesn’t mean your body isn’t under stress. 

For example:

Imagine you’re in one of the most fulfilling seasons of your life. 

You’re booked in a show in your city of residence. 

Your free time consists of dance classes, voice lessons, and workouts. 

You also teach fitness classes three days a week in the mornings. 

Your nights consist of three hours of dancing in a show. 

You’re doing this 8 shows a week and on your off day, you’re hitting up your favorite fitness class. (I mean, you get free classes at the studio where you teach, so why not?)

Sounds great, right? 

This isn’t a trick question, to a lot of us, it does sound great! And there is nothing wrong with this schedule.

But it is  A LOT of stress for your body to sustain day after day, week after week.  And that stress is going to affect your sleep, your energy levels, and how efficiently your body works in and recovers from the gym.

It doesn’t mean you can’t maintain a schedule like this, but it does mean that your training needs to adjust to keep your body in tip top shape.


So, How Do I Tailor My Training to My Seasons Of Life?

There are three major ways to tailor your training to your seasons of life: respecting rest, identifying stress, and listening to your body. 

Respecting Rest

First, you have to dismantle the idea that rest is not productive. In fact, rest is an imperative part of making progress toward any fitness goal. In order to appropriately tailor your training to your seasons of life, you must understand and acknowledge that truth. 

Let me share a short story with you. 

I had a client who I’d worked with for a long time. Her side job was instructing barre classes and she danced…A LOT.  

One week she expressed how tired she was. She was in rehearsals for a big gig coming up that weekend, she was taking a masterclass with an instructor who was in town, and she was heading to a night class to build a relationship with a choreographer who had called her back for a show recently. She had a gap in her day between teaching and rehearsals and said, 

 “I thought about going home, but I think I’m going to take a barre class. It’s free and what am I going to do at home? Just sit there?”

I looked at her for a moment and said, “Yes. It sounds like your body needs it.”

She responded “But my costume this weekend is itty-bitty and I want to look snatched, ya know?”

Oof. I felt this. I, myself, have been guilty of believing that if I just work my body constantly it would submit into the shape I wanted it to be. 

But want to know a secret? On top of the fact that one class will not change your body, stress (physical, emotional, and mental) can cause bloating and other GI issues – so if snatched is the goal, that extra class might actually do you a disservice. 

What’s more, overtraining during seasons of stress makes you more susceptible to injury!

So stop holding yourself to a standard that isn’t helping you reach your goals. It’s okay to skip the gym during a season of stress.  It’s ok to choose a lower-intensity workout even if the stress you’re under isn’t physical. You’re entire body is connected; mind, body, and spirit. 


Identifying Stress 

Next, you have to practice identifying stress in your life. If you’re in a season of life where you’re struggling with an injury or illness, even if you “feel” well, your body is under stress. In a season like this, shifting your training to more gentle forms of exercise/movement, and getting plenty of rest is going to be key to healing. 

Stress isn’t always bad stuff though. Callbacks are exciting and charged with hope and the opportunity to perform! However, a week full of callbacks taxes your body mentally, emotionally, and physically. 

The same is true about the rehearsal process of a show. Your brain is working in overdrive, emotionally you’re balancing excitement and exhaustion and making new friends, and physically you’re dancing way more than if the show was mounted. 

If you’re in a season of life like this, it can be especially hard to shift your training focus. But the reality is, this type of season of life is not the time to enter into a cut phase. It’s not the time to up the intensity of your workouts.

Instead, this is the time to shift the focus of your training from growth to maintenance; taking plenty of rest days and maybe focusing more on mobility, recovery, and fuel. 


personal training for dancers,online personal training, resistance training for dancers


Listening To Your Body

Finally, you have to hone the skill of listening to your body. 

There is a great deal of difference between a lack of motivation and your body asking for a break.

Learning how to differentiate between the two is the key to adapting your training to different seasons of life. 

A good indicator that you need a break is that you actually feel tired. This is also a sign that you’re not adequately fueled up. So, if this is you, make sure you’ve been eating plenty of protein, carbs, and fat to fuel your current lifestyle. If after that you’re still exhausted, take a break. 

Another indicator that you’re tired is if you are noticing any cold symptoms. When we are stressed, our immune system depletes. Feeling a sore throat coming on, a headache, or other symptoms might be a signal to rest for a day or two. 

Finally, if stopping your resting sounds terrible to you, that’s probably a sign that you need a break. Sometimes, when we are busy, stopping to rest feels like an abrupt slam on the brakes. Instead, I want you to view it as a gentle tap on the breaks to help you safely get around a sharp corner. Your car isn’t stopping, it’s just slowing down so it can remain in control.


If Every Workout Is Intense, No Workout Is Intense 

If you’ve been with DWL for a while you know that we believe in mixing up our training. 

It’s not optimal (or healthy) to be in a caloric deficit all the time, but there are seasons of life where it’s possible and goals for which it’s necessary.  

It’s not optimal to constantly be in a building phase. 

Eventually, we want to reach a place of maintenance. 

So, if you’re looking to build muscle, do a cut, or any other fitness goal that’s going to require an increase in intensity, talk to your coach first about your life.

What adjustments need to be made? Can those adjustments happen right now?

And if the answer is no. That’s okay. Just because you’re in a season that doesn’t allow for 4 lifting sessions in a week right now, doesn’t mean that it’s forever. 

Everything has a season, everything has a time. (Name that show tune!) Adjusting your training to eb and flow with the seasons of life you encounter will change the game for your progress. 

Don’t have a coach to strategize with? Click here to learn more about our Body Mechanics program. It’s specifically designed to give you the tools you need to achieve your fitness goals as a dancer – and all with access to a coach

assisted chin-up

Training Tip Tuesday: Leg Assisted Chin-up

Whether you are on a journey to complete your first chin-up, multiple chin-ups, or you are just committed to improving your back strength and posture, let me introduce you to one of my favorite foundational and supplementary moves to help you get closer to your goal: the leg assisted Chin-up.


The Leg Assisted Chin-up is amazing if you: 

-don’t have access to an assisted chin-up machine 

-don’t want to mess around with bands for assistance 

-are kind of scared of heights 

-are still working on your grip strength 

-want to increase overall volume of your vertical pull


Set up is pretty easy: 

To set up your leg assisted chin-up, head to your squat rack or Smith machine. 

Lower the bar to about belly button height then, Set your hips on the ground beneath the bar.

Reach your hands directly overhead to grab the bar.

Then, depending on how challenging you want to make the move, bend your knees tighter to your body for more assistance, or walk your feet away from your body for less assistance (like an upside down plank).

Once you’re in position, pull your chin to the bar and get those gains! 


That’s all there is to it!

This may seem like an entirely different exercise than a chin-up. You might even be thinking, but it doesn’t even look like a chin up. 

Well, the thing about the leg assisted chin-up is that it not only works the same back muscle groups as a chin-up (making the muscles needed for a chin-up stronger) but it also forces your abdominals to kick on. This recruitment of your abs is the key to any chin-up, assisted or not. 

So, it’s fair to say that training in this way will teach your abdominals to join the party when performing this move, ultimately bringing you closer to your chin-up goals even faster.  

Do you think you’ll try it?

Let us know if you do! We’d love to celebrate you reaching a fitness goal! 


Did you like this Training Tip? Check out these blogs for more fitness secrets: Well, Isn’t That Handy?! An App-Free Guide For Tracking Food, How to Do a Proper Deadlift: The Ultimate Guide for Dancers, Performance vs Outcome Goals: The Role of Each In Productive Goal Setting