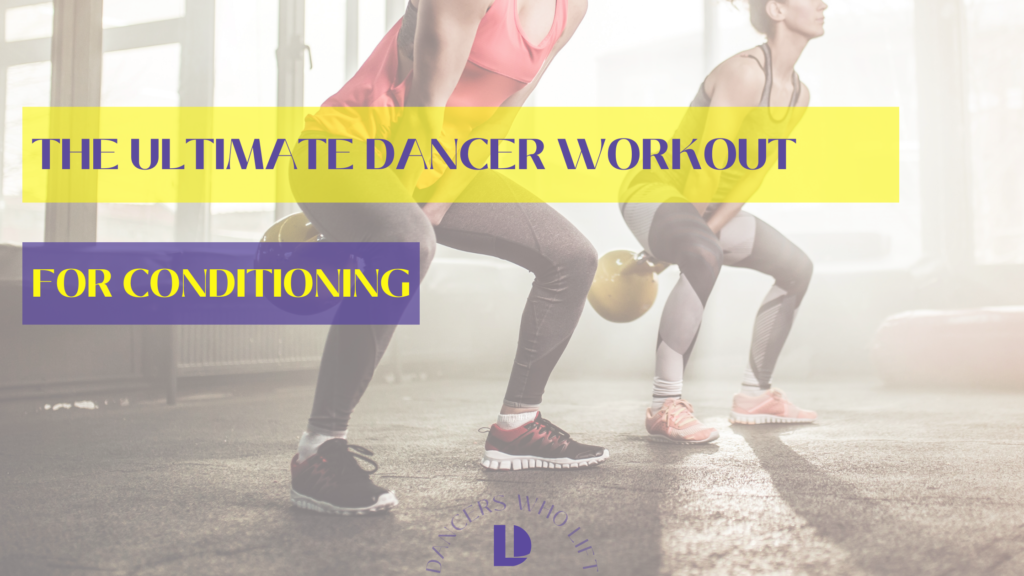
How to Crush Your Fitness Goals When Performing on Cruise Ships

Performing on a cruise ship is a pretty sweet gig.

You get to do what you love while exploring the world. No rent. Free food. Plenty of downtime to hang out and work on personal projects.

And oh yeah… you’re getting a paycheck that’s probably double or triple what the local theatre production of Mama Mia is paying.

I’m a realist to my core, so I need to tell you that performing on a cruise ship isn’t all shimmies and sunshine.

You live with your coworkers (drama WILL ensue).

There are loads of nonsensical ship rules that you have to follow.

And you’ll encounter some serious roadblocks to your health and fitness goals.

One day you’re a starving artist hustling through the streets of *insert city here but probably NYC.*

Next you’re a contracted employee with a stable income, cheap booze, unlimited free food, and loads of free time.

There are hot pancakes and bacon every morning?

Wine for $2 a glass? I can stay up until 2 am without worrying about the A train not working or that 6 am alarm?

Next thing you know, you’re stepping onto a scale for weigh-ins*, and the wardrobe manager is whipping out the dreaded tape measurer.

*The industry is rapidly changing to accept all shapes and sizes.

However, whatever body size you are when you’re fitted for costumes is the size you need to maintain.

The costumes need to fit, and it’s often cheaper for them to send out someone new than have a new costume made.

How do I know all of this? Well, I’ve experienced it.

Maybe It’s Time to Introduce Myself…

Hi. I’m Katie!

I was born and raised in Staunton, VA and a wannabe competition kid throughout my youth. (I say wannabe because the team didn’t go to many competitions… maybe 3-5 a year.)

A member of said competition team with the fearless founder of DWL herself! Dance was my life, love, and passion, so I pursued it in college.

I graduated in 2015 with a BFA in dance and BS in economics from George Mason University.

I proceeded to dance professionally across the tri-state area, across the country, and across the world.


Which segues us back to ships….

I’ve spent 21 months performing on cruise ships. And an additional three months (and counting) at sea as a partner on board. (My fiancé works on ships, and I’m currently sailing with him around Africa!)

My first contract was a trainwreck in terms of fitness and wellness.

Recall those pancakes and $2 glasses of wine I mentioned earlier.

Well… that was my life.

Food-wise, I was going ham on the buffet because I had just spent three months needing to budget for every single item in my grocery cart.

Booze-wise, I was living out the college days I never got to have because of my double degree workload.

Sprinkle on pasta and gelato in port because my contract was in the Mediterranean.

The next thing I know, I’m 10 lbs heavier, and that dreaded tape measure is being wrapped around my legs.

I was mortified.

So, I went on a crash diet. Nearly zero carbs and no alcohol, coupled with skipping meals and an intense gym routine.

I lost the weight.

But I also lost so many amazing experiences in Spain, Italy, and Greece because I was so obsessed with everything I was putting in my body.

Then BAM. Hamstring strain.

No more gym, and no more willpower to live on chicken, egg whites, and vegetables.

Surprise! I gained the weight back just as the contract came to an end.

My second contract was also a trainwreck, but in a different way.

I walked onto the Konningsdam with an intense fear of gaining weight.

Instead of having a coach and a plan, I restricted carbs, and I told myself that a quest protein bar was acceptable as a meal.

I lost weight and was super lean and fit.

Everyone told me how great I looked, which further fueled the fear of weight gain.

Here’s the thing, I WAS enjoying alcohol from time to time and I WAS enjoying food in the Baltic.

Plus, I was lifting heavy things and getting stronger.

At the time, I truly believed I was making smart choices and being “healthy.”

In hindsight, I see that I wasn’t treating my body kindly.

Which brings me to my third contract (and beyond…)

After taking a year off from ships, I headed to the Westerdam with a coach in my pocket (oh HEY DWL!) and much more knowledge about fitness, health, and nutrition (during my year off from sea, I was working as a fitness professional in NYC while auditioning and performing around the tri-state area.)

I FINALLY cracked the code on how to turn cruise ship goal-busters into goal-boosters to live a well-balanced life.

Which is what I’m here to chat with you about!

I’m sharing the top tips and tricks I’ve learned over my time performing on a cruise ship to help you walk off that gangway for the final time happy and confident.

First things first, set your goals and/or wellness bench markers you want to reach/maintain during your contract.

While they can be aesthetic, I personally have found much more happiness and success when I set intrinsic and performance-based goals instead.

Everyone’s goals will be different!

Think long and hard about yours and write them down. Maybe it’s to deadlift 1.5x your body weight. Maybe it’s to get 8 hours of sleep every night.

Maybe it’s the ability to enjoy a great meal without food guilt….

My current stint onboard is 52 days (35 days in at the time of writing this…), and I set 4 goals.

  1. Smith Machine Sumo Deadlift: 150lbs, 5 sets of 5 reps
  2. 3 Point Row: 45lbs, 5 sets of 5 reps
  3. 150 minutes of cardio every week. (I LOVE strength training, but since I’ve retired from dancing, I haven’t kept up my cardiovascular health. Getting that endurance back has been a rewarding challenge! A mini goal within in this was to run 3 miles without stopping…. check!)
  4. Write 30 minutes (for myself/The Frugal Foodies) every single day. (A mini goal within this is two blog posts a week for Thefrugalfoodies.com)

And here are my personal benchmarkers for checking in with my mental and physical wellness…

  • Monthly Period: Me and my period have a rocky history. Getting it every month is one of my primary benchmarkers of total body health.
  • Shiny Nails
  • Sleep Quality

Now let’s get into 3 rules of ship life that will help you conquer whatever goals you might have set.

Rule #1: Prioritize Nutrition on the Ship, Enjoy Yourself When You’re on Your Trips!

The Cruise Ship Goal Buster: Free, endless food with no nutrition labels and no way to count macros.

The Cruise Ship Goal Booster: Free, micro nutrient-dense food is available every day! No meal prep, no $$$$ required!


You are a smart performer who already knows what a well balanced, fueling meal looks like.

The problem is that life gets in the way. Callbacks, getting asked to do a double, getting stuck on the A train for 30 minutes, and deciding to hop into a class last minute makes it really freaking hard to meal prep, cook, and stick to your well-crafted plan.

Those problems don’t exist on ships. And being on contract is your perfect opportunity to zone in on how you fuel your body.

“Okay cool… but Katie… there are no nutrition labels!!!! How do I approach the Lido?! Those goal busters are pretty brutal….”

You’re a savvy Dancer Who Lifts! It’s all about creating your “Lido Meal Plan” and sticking to it!

I am not qualified to give nutrition advice and I highly recommend working with someone who is.

However, I’m going to share what type of Lido Meal Plan works.

I joke that I eat every single meal out of a bowl… and it’s true. I do! So I’m officially coining it as “The Bowl Method.”

I start at the salad bar with a big bowl of raw veggies (micro-nutrients…check!) along with chicken or turkey (protein…check!).

Then I make my way over to the hot line and choose a protein that has minimal sauce (because we heart protein), whatever cooked veggies they have because they usually have oil on them (more micro-nutrients+fats… check!), and rice (carb… check!)

Then I dump the plate into the bowl, mix it all together, and dig in.

This method is what leaves me feeling energized and fueled.

Bonus Tips!!!

  • Having protein powder in your room makes it easier to reach your protein goals. (I put some in a little baggy and add it to my oatmeal for breakfast)
  • Counting macros isn’t for everyone… BUT doing it for a month or two can teach you how to guestimate your meals if you need a less intuitive, more concrete approach.

I prioritize my “Lido Meal Plan” on board to enjoy the amazing foodie opportunities in port!

Nutrition is like budgeting.

You have your allowance of carbs, fats, and proteins for the day, and it’s up to you to decide how to spend it.

Personally, I love new food experiences and trying cultural eats.

So, I take on the Lido with a “food is fuel” mindset, prioritizing micro-nutrients, whole foods, and protein.

And I save 20-30% of my budget as “fun funds” out in port.

(You can check out my blog Thefrugalfoodies.com and follow me on insta @the.frugal.foodies)

This approach makes me feel and perform my best while getting to fully enjoy new cultures free of food guilt because I trust my budget and know it works.

Rule #2: If You Booze, You Lose

The Cruise Ship Goal Buster: Cheap, plentiful alcohol.

The Cruise Ship Goal Booster: The occasional drink is a great way to socialize with the cast and crew without needing to spend a lot.


It’s pretty rewarding to sip on a bougie $3 cocktail by the pool in the middle of winter when just a year ago, you were lining up at 4 am for an open call.

It’s SO EASY to find yourself at the bar with tequila soda #3 sitting in front of you for the 3rd night in a row.

Booze is cheap, you don’t have to worry about how you’ll get home, and hanging out at the bar is a fun social outlet.

But excessive alcohol is going to take a toll on your goals.

Not only do liquid calories add up, but they also might encourage you to buy a bag of chips.

Or go up to late night at the Lido for a snack (that’s likely fried).

It also effs up how your body feels the next morning.

That hangover might make those pancakes and bacon extra tasty, and it might make you skip your gym session.

It also might make you sad, emotional, and feel unstable.

Here’s the thing, being social is fun, and there’s nothing wrong with the occasional drink.


Tips That Have Worked for Me to Fight the Booze Blues:

  • Sticking to/switching to sparkling water with a lime or a diet soda. It wards off those annoying, “Why aren’t you drinking?!?!” conversations that could peer pressure me into adding some vodka. It also gives my body time to register how I’m feeling.
  • Suggesting a game or movie night instead.
  • Surrounding myself with friends who are more likely to get up at 6 am for a day of exploring than closing the bar. This one is HUGE. Choosing an inner circle of people who share your ideals and have similar goals and habits make a world of difference.
  • Turning 29 years old…. The hangover just isn’t worth it!

Rule #3: Move Your Body to Stay a Bad Ass Hottie

The Cruise Ship Goal Buster: The more time you have, the less you get done.

The Cruise Ship Goal Booster: You have so much time! Create a movement schedule and stick to it.


In land life, you’re on the go, running from an audition to work, to class, and maybe even to the gym.

In ship life, it’s shockingly easy to stay in bed all day binging a tv show you snagged from someone’s hard drive.

“Get up and get moving!”

Lifting weights, moving your body, getting your heart rate up, and mobility is essential for your physical and mental well-being.

They are also important components of cross-training for avoiding injuries and tackling hard shows with ease.


Tips That Have Worked for Me:

  • Going to the gym at the same time every training day.
  • “Smart Girl” podcast walks on the outer deck (learning something new + fresh air + movement = a home run!)
  • Stairs > Elevator (My uphill endurance for challenging hikes has REALLY improved…just saying.)
  • Add in fun bonus movement sessions every week: give yourself a dance class.

Maybe your gal pal Allison is a yoga teacher. Perhaps you join the passengers for an AM spin class.

Remember… moving your body is supposed to be FUN.

“Move More, Drink Less, and Eat Smart.”

These are simple rules that will set you up for success. But, as you probably know, it’s not that easy.’


Here are two principles to help you stick to the rule book.

  1. Create Productive Habits Early, and Crush Your Goals; you Will do Surely
  2. Crushing your goals all comes down to creating sustainable habits.

If you aim to get more sleep, perhaps you create the habit of going to bed at 11 pm and waking up at 7 am.

If your goal is to get super strong, perhaps you create the habit of going to the gym at 4 pm every single training day.

If you aim to maintain your technique, perhaps you create the habit of warming up with a ballet barre before every show.

If your goal is to minimize stress, perhaps you create the habit of meditating every day for 10 minutes.

You get the picture!

Crash diets don’t work. And neither do crash habits.

Some gurus say it takes 21 days to form a habit; others say 66 days. One thing is clear: habits

don’t happen overnight. Take time to really pinpoint what habits you want to build, then add

them into your daily routine one at a time.

“Mindfulness is Key”

“Mindfulness” is one of those hot topic words that’s ironically thrown around in mindless ways.

However, once the meaning of being mindful clicked for me, I experienced so many positive changes in my life.

To me, mindfulness means having intention and being aware of what I say and do, and constantly checking in with myself by asking,

“Why am I doing/writing/posting/eating/drinking/etc. this and how does it serve me?”

Simple in concept but complicated in practice.

This fast-paced world throws overwhelming amounts of stimuli and information at us that disrupt the ability to be in tune with our bodies and minds.

It’s also easy to get caught up in doing things that we believe SHOULD serve us instead of assessing what things ACTUALLY serve us.


Ships are the perfect place to start being mindful of mindfulness.

There are fewer outside stimuli to pull you away from your original intention and more time to really think about and digest what said intentions are.

Plus, the internet tends to be slow, which means less social media scrolling.

Personally, this really helps me stop comparing myself to others to weed out those pesky “shoulds.”


Whether you’re at the gym, at the bar, in Lido, or hanging out with friends, take a second to

pinpoint your intentions and ask yourself, “Why am I doing this?” You’ll quickly realize what’s

serving you and what’s not.


Eat smart, move more, drink less, create productive habits, and do it all mindfully.

These principles will help you crush your ship goals so you can have an amazing contact and walk off that gangway feeling confident and ready to take on whatever is next.


xo

Katie

Protein Packed!

It may seem like every time we talk about nutrition; we’re talking about protein.

But that’s because protein is such a huge part of how our bodies function!

Did you know that every cell in our bodies contains protein?

Protein plays important roles in our immune function, metabolism, feeling full, weight management, body composition, and athletic performance. That’s why proteins are often referred to as “the building blocks of life!”

So, as you can see, it’s a no-brainer that a dancer is going to need plenty to thrive.


But just how much protein do we need?

The daily recommended protein intake for a high-intensity athlete (that’s us) is 1.4-2.0 grams of protein per kilogram of body weight. In pounds, that means that we should consume about .64-.9 grams of protein per pound of body weight. An easy way to make sure you’re hitting this goal is to aim for one gram of protein per pound of body weight. This way, if you are a little bit under, you’re still in a great range, and the math is easier! 

The next question is, ‘How on earth do I eat that much?’ At first, that sounds like a lot of protein, and it can seem daunting. But with just a few intentional choices, you’ll be hitting this goal consistently in no time. 


The best way to get into this habit is by planning ahead.

You want to make sure you are eating your protein in chunks throughout the day rather than all at once. That will help you maintain your energy levels throughout the day and will keep you from feeling overfull after your meals. To review, here are a few easy-to-find protein-packed foods to help you plan your meals: chicken, eggs, turkey, any red meat, fish, shellfish (like shrimp!), greek yogurt, cottage cheese, lentils, beans, tofu, and tempe. There are also, of course, protein powders, shakes, and bars as well.


Use protein hacks to maximize meals.

One of my favorite protein hacks is the protein latte. Make or order two shots of espresso (or cold brew) and put it in a large cup. Then add your favorite protein shake. Suddenly your latte is worth at least 26 grams of protein – add an egg white omelet, and you could be 50 grams of protein closer to your macro goal just by eating breakfast. 

Are you an oatmeal person? Why not make it protein oatmeal by adding a scoop of protein powder? More of a cereal snacker? Why not use a vanilla protein shake instead of milk? Bonus points if you choose to use a protein-boosted cereal like Premier Protein Cereal or Magic Spoon! We’ve found that frontloading your protein in the morning can make hitting your macro goals much easier. And bonus, eating before you drink your coffee (or with it in a protein latte) helps prevent your cortisol levels from spiking, which protects your body from going into stress mode.

Still feeling like you might be too full? Let’s walk through a potential day trying to hit 140-150 grams of protein. 


Breakfast: Protein Latte: 26 g. protein

      Omelete; 4 egg whites, one whole egg, veggies, half ounce of cheese: 24 g. Protein

      Daily Total: 50 grams of protein

Lunch: Big Ass Salad (BAS), Banana, Can of Tuna: 22 g. Protein

Daily Total: 77 grams of protein (Halfway there!)

Snack: Greek yogurt with fruit: 20 g. protein

Daily Total: 97 grams of protein

Dinner: Chicken and Pasta; 4 oz Chicken, Chickpea Pasta, Marinara: 48 g. Protein

Daily Total: 145 grams of protein (NAILED IT!) 


Now, I’m not here to tell you that eating like this comes easily. Culturally, protein is not usually the largest portion on our plates. But with just a few intentional adjustments, hitting your protein goal every day is well within reach. Whether it’s swapping greek yogurt for sour cream on your tacos or adding greek yogurt or cottage cheese to your fruit plate, there is almost always a way to add some protein to your meals and snacks.

Give it a try, and let us know how you do! We love hearing how our community is getting their protein in!

xox Am 

PS if you want to work with a pro-dancer/ certified personal trainer who can make tailored training, nutrition, and recovery plans for you, you should check out our 1:1 coaching program, The Embodied Artist Academy


Well, Isn’t That Handy?!

Let’s talk about tracking our food. For a lot of people, tracking food can be a challenging habit to create. And, despite it being an excellent and precise tool for following a nutrition plan, sometimes it’s necessary to take a break from the app. But just because we aren’t using a fancy app doesn’t mean we need to give up on tracking our macros. In fact, one of the easiest ways to track your macros is with something you already have: your hand!  

It’s true; the appropriate serving sizes for your macros for each meal can be measured by looking at your hand. And the best thing is, your hands come with you everywhere–how handy!

All jokes aside, the fact that these measuring tools come with you everywhere is a huge plus. This way, when you’re out to eat or not able to weigh your food with a scale, you’re still able to get a good idea of what you’re consuming. Another perk about using your hands is that they are a consistent size and are scaled to the individual. Bigger people with larger macro needs will have bigger hands for larger portion sizes and vice versa. The main thing is, tracking your food this way is effective and simple. So let’s get started!

Let’s focus on protein first.

One serving of protein should be about the size of your palm. This will be about 20-30 grams, or four ounces, of protein. This could be chicken, eggs, greek yogurt, or any protein; the goal is to have one or two of these “palm-sized” portions per meal. 

Next, let’s tackle our vegetables.

While veggies aren’t a “macro” of their own (they fall into the carb category), they are an important part of every meal. They contain important micronutrients and fiber necessary to maintaining a balanced diet. At each of your meals, you’ll want to aim for your serving of non-starchy vegetables to be the size of one balled fist. This could be a side salad or some sauteed broccoli; the important thing here is to measure this in the form they will be eaten. Some veggies shrink when they are cooked – we’re looking at you, spinach– so you want to make sure you’re getting an accurate measurement of what you’re eating.

That brings us to our starchy vegetables and carbohydrates!

Using this hand measuring system, one serving of carbs will fill a cupped hand. So, hold your hand out like you are going to cup water and imagine that it’s full of rice, pasta, mashed potatoes, or whatever your carb is for that meal. Again, we are measuring these things in the form in which they will be eaten- if you measure dried rice in a cupped hand, you’ll find yourself consuming more servings of carbs than you might be aiming for. One cupped hand is usually about 20-30 grams of carbs. 

Finally, we get to our fats.

A good rule of thumb for measuring fats is “the rule of thumb!”  No, seriously, one serving of fats is about the size of your thumb! This is equal to about one tablespoon of cooking oil or 7-12 grams of fat-dense food. Depending on the meal, you’ll want one to two servings. This can be the trickiest because it’s easy to measure with your heart when it comes to olive oil and even harder to realize how much you’re consuming when you’re dunking bread in it at the Italian restaurant. Just remember, any adjustment is better than none. So, give the rule of thumb a try!

This system even works with more processed foods like chips or cookies. Let’s say you’re eating a chocolate chip cookie; look at the size of the cookie and take a look at your cupped hand; how many servings is it? Some cookies might be about one; others could be as large as three! Same with chips. Picture a small handful of salt and vinegar chips; you could count that as about one thumb full (one serving) of fat, OR you could measure it as one cupped hand (one serving) of carbs. You get to decide if you treat it as a carb or fat, depending on the food! 

Next time you need a break from counting your calories or when you’re on vacation and avoiding your phone, try using your hand to keep tabs on your nutrition. You might be surprised by how easy it is to make well-balanced choices with this method in mind! And who knows, maybe you’ll find that keeping track of what you eat doesn’t have to be so hard after all.


xox DWL Team 

PS. Do you want to claim everything that’s already yours– fitness, nutrition, and mindset? Connect with our team of experts and join The Embodied Artist Academy, our personalized coaching program for performers. 

10 Ways to Stay on Track While Eating Out

We’ve all been there.

You’ve been diligent with your nutrition, you’ve been hitting your workouts, and you’re starting to see major results.

Then a friend calls, “Let’s grab dinner this weekend! I heard about this great new spot!” 

You say yes, excited to spend some quality time with good friends, but then the anxiety starts to seep in. There are few things I love more than spending time with the people I love. Going out for a good meal and breaking bread deepens relationships in a way that few other activities can. But when we are in a cut or dialing in our nutrition, going out to eat with friends can easily become stressful.

Well, community is a big part of supporting our mental health, and we know that when our minds and bodies are healthy is when we see the most progress. So, I’ve put together a list of ten things you can do when eating out to ensure you stay on track without sacrificing a night with your friends!

ONE: Don’t save up your calories all day.

It’s true that you want to be mindful of your macros if you’re planning on eating out at a more indulgent meal. But starving yourself leading up to dinner can lead to overindulging. Instead, wake up and have a regular breakfast and lunch. Instead of smaller portions, focus on eating lots of fruits and vegetables with protein to get your macro and micronutrients! This will give you lots of carbs and fats to use at dinner while ensuring that you’re still fueled for your day!

TWO: Look up the menu before you go!

One of the perks of living in the digital age is that you are able to find almost anything online! So, instead of playing the guessing game with your macros, take a look at the menu ahead of time and plan around whatever you’re hoping to order! It also gives you a chance to look at what dishes have more protein and what types of side dishes you could opt for instead of fries. Having these choices mapped out ahead of time can eliminate any stress that going out will knock you off track. 

THREE: Drink plenty of water!

This sounds incredibly simple, but foods from restaurants tend to be higher in sodium, making us feel more dehydrated, which can trigger our hunger signals. Staying hydrated helps us prevent overeating. Plus, staying hydrated will definitely come in handy should you decide to have a glass of wine or cocktail at dinner!

FOUR: Feeling snacky? Have a snack.

We’ve all been there. You get to the restaurant, hungry for a good meal, and the server plops a giant basket of chips and salsa in front of you. Before you know it, you’re salting the second basket and wondering if you even need to order your enchiladas after all. Having a healthy snack before dinner takes the edge off your hunger just enough so you can enjoy the chips without spoiling your supper. 

FIVE: Ask for what you need.

Let’s say you looked at the menu, and the penne a la vodka is calling to you, but it doesn’t have any protein. Ask your server if you can add chicken or shrimp. Nine times out of ten, even if an option for extra protein isn’t listed, a restaurant is happy to add some to any dish if you ask!

SIX: When in doubt, opt for veggies.

Just like when you cook at home, making sure you are getting as many vegetables as possible with your meal is important when you’re eating at a restaurant. Add a side salad, or order one as an appetizer. The best case scenario is you get extra veggies in your diet; the worst case scenario is you fill up on veggies, and you have leftovers of a delicious meal to enjoy the next day!

SEVEN: Get the sauce on the side.

Salads are often over-dressed, and lots of menu items come with any number of sauces. Asking to get the dressing or additional condiments on the side not only can save you some calories but also allows you to add however much or little you like!

EIGHT: If you are worried about controlling your portions, ask for a to-go box.

Restaurant portions are often bigger than normal. Asking for a to-go box right away and putting a bit of your entree in there can help you ensure that you’ll have leftovers for lunch the next day and ensures you will only eat until you’re full. 

NINE: Eat slowly.

Did you know that your first bite of food has a much stronger taste and creates a stronger sensation than each bite after?  It’s so easy to eat quickly, especially when the food is tasty. But try and take the time to actually savor and enjoy your food, noticing the textures and flavors of each bite. This not only helps you slow down and listen to your hunger signals but keeps you present while enjoying your meal. 

TEN: Drink water while you eat.

I get it, the food is so good, and the conversations are flowing; it’s easy to forget to pause and take a sip of water. But stopping and taking a sip of water not only helps you slow down, but it aids in digestion and helps us listen to our bodies when we are full. 

Being stressed about food is not our goal. Having a healthy relationship with food is. Having a healthy relationship with food means that we have the power of choice. If we understand how food fuels us and what we need to reach our goals, we have the power to make choices – even at a restaurant – that get us closer to those goals. So make that reservation, go out, and have a good time! And if you are worried about going off the rails, choose two or three of these tools to keep your anxieties at bay.

You’ve got this!

xox Am 

PS if you want to work with a pro-dancer/ certified personal trainer who can make tailored training, nutrition, and recovery plans for you, you should check out our 1:1 coaching program, The Embodied Artist Academy

Make Your Food Work For YOU – Not the Other Way Around!

You’re ready.

You’ve worked out your calories and macros, you’ve gone grocery shopping, and you’re set to zero in on your nutrition.

The only thing stopping you is figuring out how to map out your meals and macros.

How often should you eat? What if you don’t have time for three sit-down meals in a day?

It’s no secret that dancers’ schedules are not always conducive to what most people consider a “normal” food schedule, and while culturally we talk about having “three square meals a day,” that might not be the best setup for you every day. Between rehearsals, tech weeks, and audition season, our days fluctuate, and staying full throughout the day makes a big difference in how we tackle each day’s unique challenges. Somedays, you might have more time to enjoy three bigger meals. But during those tough rehearsal days and end-to-end auditions, we need to ensure that we have enough fuel to keep us focused and energized, which might mean five to six smaller meals during the day. Yet packing snacks here and there without a plan can lead to lopsided macros that leave you hungry an hour into rehearsal. So, how do we suggest making sure you’re getting what you need? You guessed it: make a plan. 

First things first, take a look at your schedule.

Are you running around town all day, hitting classes, filming auditions, and working your side hustle?

Or are you cleaning the house and working from home?

Next, check in with yourself.

Do you like to eat bigger meals, or do you prefer small meals and snacks?

Maybe a combo of the two?

I tend to prefer three bigger meals and two snacks. This ensures I don’t get too hungry between meals, and I stay fueled for the day ahead. With that in mind, I take a look at my macros, and I divide them up like a budget. I find that it helps to plan out my bigger meals first, making sure I have a good balance of carbs, protein, and fat. These meals usually take up the bulk of my macros. Then, with what’s left, I build in my snacks. The most important thing to remember is – no matter the size of your meal or snack – try to make it as balanced as possible, so your brain and body have all the fuel they need for the tasks ahead!


The best thing about this system is that you don’t have to do the same thing every day. Maybe one day you have a really full schedule, so that day you might focus on having lots of snacks packed for the day and enjoy bigger meals at breakfast and dinner. But let’s say you have the next day off; so, that day, you might have three bigger meals that you can sit and enjoy fully with plenty of time for digestion. The beauty is you get to decide what’s best based on your needs. So, take a look at your schedule and get planning! Once you start making your macros work for you instead of the other way around, you’re not only going to stop worrying about food, but you’ll be hitting those macro goals on a daily! 

What more could a dancer ask for?

xox Am 

PS if you want to work with a pro-dancer/ certified personal trainer who can make tailored training, nutrition, and recovery plans for you, you should check out our 1:1 coaching program, The Embodied Artist Academy

20 Conditioning Workouts for Dancers


I want to preface that this article is written in outrage. 

Or rather, irritation.

Not at anyone specifically, but just in general, over this misconception that “conditioning” for dancers looks like tuck jumps and burpees. 

Seriously, if you do a .5 second search, you’ll find: 

  1. Burpees, squat jumps, and reverse lunge to skips 
  2. 8 minute abs. A variation of crunches in ever position, v-sits, and boat pose
  3. Some monster-mash hybrid move of a dancer balancing on a bosu ball in a full penche while doing tricep kickbacks with 2 pound bala bands… 
  4. Run a dance… then run the dance again… then again… then, oh the dancer has melted into a puddle on the floor? Better do some squats, push-ups, and planks before, you guessed it, running the number one more time. 

WHY GOD, WHY?!

So before I share 20 Conditioning Workouts for Dancers, let’s define what conditioning is and, more importantly, what it is not. 


So What is Conditioning? 

DEFINITION:

Conditioning is a process in which stimuli are created by an exercise program performed by the athlete to produce a higher level of function. 

GOAL:

The goal of conditioning is to optimize the performance of the athlete and minimize the risk of injury and illness.” (1) 


In simple terms, conditioning creates an environment where the dancer or athlete is stimulated (challenged) to perform a higher level of function with the intended outcome of improved performance and reduced risk. 

In even simpler terms: Move better, risk less. 

Conditioning is NOT working out with the intention of getting sweaty and getting tired. 

Conditioning is thoughtful, intentional, targeted training. 

Most good conditioning workouts, like the ones you’ll see below, emphasize:

-Improvement on specific skills (height of a jump, length of a jump, quickness of an action) 

-Improved cardiovascular recovery time. Ie helping an athletic artist lower their respiratory rate quickly. 

Another thing of note, should you choose to implement conditioning training into your own or your dancer’s routines… 

Conditioning workouts, when done properly, take a big metabolic toll on a person. 

Meaning, they require a ton of additional energy. 

The workouts themselves are usually performed at a higher intensity, which requires more energy. 

AND unlike traditional cardio, like jogging or ballet barre, which of course also require lots of energy DURING the workout, conditioning workouts require extra post-workout as well. 

They will tax one’s nervous system. 

They will stimulate muscular adaptation. 

SO a full-time, or even part time performer, should USE CONDITIONING WORKOUT SPARINGLY! 

Less is so much more.

You need that energy for your dance technique classes, rehearsals, and especially on the stage! 

You’ll also likely need to intentionally eat MORE food so your brain and body don’t dip into an energy deficit. But that feels like a post for another day… 


Okay, onto these 20 Conditioning Workouts for Dancers 


Hill Sprint Workout

Hill sprints are one of the most effective conditioning tools on the planet. They are absolutely badass and have a host of benefits normal sprints don’t come close to matching. 

First, they are safer. 

It’s much harder to injure yourself doing hill sprints because you will never reach your maximum speed doing them. This workout in particular is so safe you can even do it after leg day without risking injury.

Secondly, hill sprints spread the training load across the legs. 

Whereas flat sprints will be overloading the hamstrings. While the hamstrings will still be getting their fair share of work, hill sprints encompass the glutes, lower ba

ck and calves. This makes post sprint recovery much easier. 

So if you take Einstein’s theory of gains into account (Gains = Intensity x recovery2) you have the ultimate winning scenario.

Also, hill sprints allow you to increase your sprinting speed, even though you’re training at sub-max speeds. Not only do hill sprints make your muscles more effective at actually performing sprints, they also perfect your technique.

Finally, if you’re a performer on a budget or traveling often, hill sprints can keep you strong and in shape for freeeee! 


1. The Super Sprint Workout

Total Workout Time: ~17 minutes
Difficulty Level: Intermediate
Equipment Needed: Legs, a hill, and nerves of steel

First thing’s first: you need to find a good hill. Some hills are great for building endurance, and others for strength and speed. We’re looking for the latter, so we have to be extra picky.

Your hill for super sprints should allow for a relatively quick but exceptionally difficult run. Ideally, the grade of the incline will be 25-35 degrees. This incline is ideal for both building sprint technique and developing power in the posterior chain.

The other factor is the length of the hill, which really translates into total sprint distance. 

Because of the steep angle, we want each individual sprint to be fairly short. Rather than have you measure a hill, which would be difficult and look strange, I’ll just have you measure by strides.

You want a hill you can crest by taking between ~15 and ~25 strides.

Don’t worry if it’s a bit shorter or a bit longer. The important thing is that you should be able to clear the hill from bottom to top in less than 10 seconds.

You’re going to be doing a lot of sprints, which will mean a lot of total work time, so we don’t want any single sprint to be too draining. 

On the other hand, if you can get from the bottom of the hill to the top in 10 steps or less, find a different hill. If there isn’t one that’s suitable, you can start your sprint about 8-10 strides away from the hill, “in the flat.” 

Make that part of your sprint.

Obviously, the only way to measure the number of strides it takes to conquer a particular hill is to test it.

So pick a hill and in the name of Merce Cunningham, run at it like you’ve got a swift 4 count to make it across the stage. It’s time to get to work.

Let’s get to work, b!tch

Set 1: 3-Sprint Combo

Sprint to the top of the hill and jog back down three times in a row, with no rest in between. After your third sprint, rest 30-60 seconds, and proceed to set 2.

Set 2: Stride Alternation Combo

  1. A) Short Stride Sprint – sprint up the hill taking short, choppy steps; almost as though you’re treating the hill like stairs. Get up as fast as you can, but try to make contact with the hill as many times as possible. Walk to the bottom of the hill.
    B) Long Stride Sprint – sprint up the hill taking the longest stride that feels comfortable. Your goal is to get up the hill with roughly 10% fewer strides than you have normally been taking. Walk to the bottom of the hill.
    C) Short Stride Sprint – sprint up the hill taking short, choppy steps; almost as though you’re treating the hill like stairs. Get up as fast as you can, but try to beat your number of steps from set A. Walk to the bottom of the hill.
    D) Mid-Stride Sprint – sprint up the hill using your typical stride length; however, try to increase your turnover rate. With the same stride length you normally use, focus on trying to increase your stride speed. Walk to the bottom of the hill.

Procedure: Perform A-D with minimal rest between. Take your time walking down the hill between sprints, allowing that to act as your rest period. After your last sprint (D), rest 30 seconds and proceed to set 3.

Set 3: 5 Single Sprints with Max Forward Lean

Sprint to the top of the hill while leaning forward as much as possible. Your stride should be slightly longer than average. When you get to the top of the hill, walk back down. Rest until you feel completely recovered. Repeat for a total of 5 sprints. After your fifth sprint, rest 30 seconds, and proceed to set 4.

Set 4: 4-3-2-1 Combo

  1. A) Sprint to the top of the hill and jog back down four times in a row, with no rest in between. After your fourth sprint, rest 60 seconds.
    B) Sprint to the top of the hill and jog back three times in a row, with no rest in between. After your third sprint, rest 45 seconds.
    C) Sprint to the top of the hill and job back down twice in a row, with no rest in between. After your second sprint, rest 30 seconds.
    D) Sprint to the top of the hill and jog back down. After your sprint, rest 60-90 seconds, and proceed to set 5.

Set 5: Strength and Speed Combo

  1. A) 10 push-ups
    B) Sprint to the top of the hill
    C) 10 push-ups
    D) Jog to the bottom of the hill
    E) 30-second push-up hold (at the midpoint)
    F) Sprint to the top of the hill
    G) 30-second plank
    H) Jog to the bottom of the hill
    I) 10 push-ups

Procedure: perform A-I sequentially, resting 10-15 seconds between each. After your last set of push-ups (I), rest 90-120 seconds and repeat set 5 a second time. 

The Epilogue 

All told, this conditioning workout will take just 17 minutes out of your day. But, just because the workout is quick and you’ll finish feeling relatively fresh, don’t go crazy and double the volume.

While this is truly difficult, if you’re not pushing beyond your capacity, this is a great stacker workout. That is, it’ll help make whatever you’re doing better—without interfering.

As a result, this workout is designed in such a way that you’ll be able to do these whenever you want or need, and still be able to make tremendous progress in your other programming AND step on stage the same night —because training for super speed doesn’t have to mean you can’t build super strength.


Jump Rope Workouts

I love jump rope workouts for dancers, a la Brooke Windam. 

Jump ropes are the ultimate tool for low-impact, accelerated fitness. 

Jumping rope doesn’t just get you whipped into shape, either. It  improves your athleticism, coordination and even builds a little muscle. 

You will get stronger, fortify bones and in time, be able to challenge the kids on your block to some highly competitive double-dutch.

(Plus, jumping and bouncing is even beneficial for lymphatic draining and hormone health!)

Anyway, it’s also a true, total body exercise. 

Focusing heavily on the arms, legs, abs, shoulders and chest there are few body parts you won’t hit while swinging that jump rope around. With all these muscles working together, jump rope develops elite levels of coordination, agility and athleticism.

The best part about all of this? 

You don’t have to go to the gym to get an awesome jump rope workout. 

All you need is a rope, a small space, yourself, and in no time you will be jumping your way to a body worth envy.

Again, this is super for the performer on a budget who doesn’t want to/ can’t spend $35 on a fitness class or has limited space in their NYC apartment or tour trunk.

The Workouts: 

For the jump rope workout, you’re going to be using two exercises. The Double Under, and the Runnin’ man. 

First, select your jump rope. Your rope should measure from the bottom of your foot to your armpit. 

Now that you’ve warmed up and have the right sized rope, it’s time to get after it.


2. The Double Under and Runnin’ Man

To get your mind and body connected and acquainted with the rope, jump rope easily for about 5 minutes or 200 jumps. This should not be exhausting, just jumping to get your heart rate going a bit. 

Rest 60 seconds after the 5 minutes of jump rope. 

For this workout we’re going to alternate between two exercises. Double Unders and the Runnin’ Man. Alternate between these two guys and prepare to get sweaty. 

A1) Double Under – 10 reps

Rest 15s

A2) Runnin’ Man – 30 seconds

Rest 45-60 seconds.

Alternate between A1 and A2 for 10-15 minutes. 


3. Total Body Jump Rope Workout:

Set a timer for 3 minutes.

Alternate between exercises with as little rest as possible.

A1) Two-footed Jumps – 20 reps

A2) Right Foot Jumps – 20 reps

A3) Left Foot Jumps – 20 reps

A4) Bodyweight Squats – 60 seconds

Rest 45 seconds and proceed to set B.

B1) Two-footed Jumps – 20 reps

B2) Right Foot Jumps – 20 reps

B3) Left Foot Jumps – 20 reps

B4) Pushups – 60 seconds

Rest 45 seconds and proceed to set C.

C1) Two-footed Jumps – 20 reps

C2) Right Foot Jumps – 20 reps

C3) Left Foot Jumps – 20 reps

C4) Alternating Jump Lunge – 60 seconds

Rest 45 seconds and proceed to set D.

D1) Two-footed Jumps – 20 reps

D2) Right Foot Jumps – 20 reps

D3) Left Foot Jumps – 20 reps

D4) Plank – 60 seconds

Done! Now it’s time to take all of the rest. Don’t forget to make pretty sweat angles on the pavement.


Battle Rope Workout

Having recently indulged in the world of Sarah J. Maas’ “A Court of Silver Flames” I imagine myself training alongside the fae of the Valkyrie when I see battle ropes (if you know you know…if you don’t know, well I can’t explain why fairy smut and conditioning workouts are linked, but just trust me)

ANYWAY

It’s time for battle and the rope is your weapon. This time, the enemy is yourself and your will.

Not simply a novel fitness fad; battle ropes are a ruthlessly effective, total body workout. 

If you’re a dancer who has ever said “I just don’t have strong arms” these ropes will get you stronger and leaner than you ever thought possible. 

There is no skill level barrier, all you need to do is pick up some high quality battle ropes and do one of the workouts below. 


4. Behind Enemy Lines

The workout here is simple. 3 exercises performed for 30 seconds with a 30 second break in between. 

A1) Alternating Waves – 30 seconds

Rest 30 seconds

A2) Double Arm Waves – 30 seconds

Rest 30 seconds

A3) Double Arm Waves – 30 seconds

Rest 60 seconds and repeat 4 times.


5. The Warrior Rope Workout:

A1) Warrior Slam (left side) – 15 reps

A2) Diagonal Slam (left side) – 15 reps

A3) Warrior Slam (right side) – 15 reps

A4) Diagonal Slam (right side) – 15 reps

Alternate between each exercise with no rest after each one. Rest 60s after A4 and repeat 4 times.

B1) 1-arm Plank Waves (left arm) – 15 reps

B2) Kneeling Plank Waves – 15 reps 

B3) 1-arm Plank Wave (right arm) – 15 reps

B4) Spread Eagle Waves – 15 reps

B5) Hip Toss – 10 reps each side

Alternate between each exercise with no rest after each one. Rest 60s after B5 and repeat 2 more times.


6. Single Arm Destruction:

A1) Single Arm In and Out Waves (left side) – 15 seconds

A2) Single Arm Circles (left side) – 15 seconds

A3) Single Arm Waves (left side) – 15 seconds

A4) Single Arm Slams (left side) – 15 seconds

Rest 30 seconds

A5) Single Arm In and Out Waves (right side) – 15 seconds

A6) Single Arm Circles (right side) – 15 seconds

A7) Single Arm Waves (right side) – 15 seconds

A8) Single Arm Slam (right side) – 15 seconds

Perform each exercise for 15 seconds. Rest for 30 seconds only after each exercise is complete on each arm. Rest 90-120 seconds after A8 and repeat 3 more times.


Kettlebell Workout

Admittedly they can be a bit intimidating. I mean, they look like someone ransacked a pirate ship and said “oh, leftover cannon balls? Let’s start a fitness trend!” 

But they don’t need to be scary and, in fact, can actually be really empowering! Kettlebells are simply a tool and a super effective one at that. 

Swing this cannonball around you’ll start seeing radical improvement in power, explosive strength, and stamina!

Here is where Kettlebells are different.

Not only are they one of the most effective conditioning tools you can use, but they begin to remedy a lot of the damage our modern lifestyle imposes on us. Like sitting at a desk all day and typing on a computer (like I am doing right now) absolutely wrecks your lower back and shoulders.

Kettlebell movements, when done properly, can undo a lot of that damage. 

PLUS, when applied to our dancing, that means strong backs, engaged abs, and structured glutes for better partnering, lifts, turns, port de bras, jumps, traveling across the floor, transitioning levels… everything really!

7. Swing ‘Till You Drop:

To set up, you’re going to need a Kettlebell that is moderately heavy and a timer.

For “moderately heavy” start with a weight that is 15-30% of your body weight.

Set the timer for 10 minutes. 

Walk up to your kettlebell of choice and hit start on the time.

Now you’re going to swing your ass off for those 10 minutes. And by ass I mean hands because good luck trying to hold on to anything after this workout. 

Only stop swinging when your form starts to degrade. Complete as few sets as possible in those 10 minutes.

Once your time is up, record the number of reps on your best set and total reps you did and try to beat that next time you do this workout. 


8. Defying Gravity

A1) Kettlebell Clean – 15 reps

A2) Kettlebell Squat to Press – 15 reps

Set a timer to continuously run. Every minute on the minute perform these two exercises back to back. Your rest period will be the time remaining for that minute. Repeat for 15 minutes total. 


9. Down and Dirty KB Complex

A1) Single Arm KB Snatch– 5 reps each arm

A2) Single Arm KB Clean – 5 reps each arm

A3) Single Arm KB Swing – 10 reps each arm

A4) Single Arm KB Squat (front loaded) – 10 reps each arm

Do not rest between exercises. Perform all reps on one side first, then switch to complete the exercise. Rest 90-120 after A4. Repeat 4 times.


Sled Workout

The sled needs more love. This sucker is going to make you look amazing, improve your conditioning and your strength. 

If there was only one thing I could do at the gym, pushing the sled would be it. It’s that great.

Sleds are just beginning to gain traction in local gyms, but they have been popular on the gridiron and silver screen for a while now. 

Every high school football team has used this one-of-a-kind tool to build speed, power and improve their conditioning. Every time I watch Remember the Titans  I want to go run outside and push the sled around immediately. (Obviously singing “We are the Titans” while doing it.)

Few conditioning tools will give you the same training effect as the sled. This will challenge you in ways you’ve never been challenged before. Great part is the set-up is easy, just make sure you bring your “A” game and you will be rewarded.


10. The Beginner Sled Workouts

Load up the sled with the equivalent of your bodyweight. 

Push it as far as you can. 

If you’re in a gym that’s going to be on the end of the floor/turf. 

If you have the luxury of being outside, put it to the end of the parking lot or designated area. Just be sure you are pushing a minimum of 10 steps.

Then, rest for 45 seconds and push it back to where you started. 

Rest 45 seconds again and repeat the total circuit 3 times for a total of 6 circuits.

There is an interesting phenomenon when using the sled called the “sled flu.” 

This essentially means you might puke or feel a bit sickly. Not to worry, it’s happened to the best of us. 

Note: if you are pushing on rubber instead of turf, load the sled with half of your bodyweight. You know, cuz friction.


11. Push, Pull and Cry

The set-up: Load up the sled with the equivalent of your bodyweight. This is upper body heavy so feel free to round down if that isn’t your strong point or you’re in an upper-body dominant show.

Next, make sure you have something to pull the sled with like a TRX attachment.

A1) Sled Chest Press – 20 steps

Step into the sled, maintain a good forward lean and back position. Then chest press the sled forward, like you’re doing a cable chest press.

A2) Sled Row – 20 steps (or until you reach the starting position)

With the TRX or other attachment row the sled back to the starting position. Be sure to sit down into a good “athletic” position, lean forward a bit and row explosively. Step back until there is tension on the TRX and repeat until you’re back where you started.

Rest 1-2 minutes after A2. Repeat 3 more times.


12. Sled Total Body Workout

Load sled with your bodyweight and attach a battle rope to the sled.

A1) Sled Push – Length of Turf (20 steps minimum)

A2) Push-Up – 20 reps

Sprint back to where the rope starts

A3) Sled Rope Pull – Back to starting position

A4) Plank – 60s

Remove 1 plate or 45#’s from the sled. Rest 1-2 minutes after A4. Repeat 4 more times, removing a plate each time. As you remove weight try to sprint faster each round on the sled push.


Beach Sprint Workout

If you’re a NYC-based performer, beach sprints might not be accessible year round… BUT! If you’re on tour, at a regional theater, or just on vacation and want to get in an incredible workout these should be top of the list.

Beach sprints are amazing not only because they make you feel like the ensemble in Mama Mia with their snorkels and flippers, but because of the nature of running in sand, beach sprints will strengthen your ankles, calves and improve your coordination…and the not quite solid sand makes them much harder. 

This will make you stronger, faster and more athletic than normal sprinting would. 

Bonus, the slightly unstable surface makes those abs work overtime.

TLDR: Beach sprints make you better at life, give you strong sexy legs, untwistable ankles, and strong abs.

To that effect, here is the workout you need:

Pace out 50 yards and mark it. That’s going to be about 50 normal stride steps or 40 really long stride steps.

Do the same for 40 yards and 20 yards.

Now that that is done, it’s time to sprint. 

Note: make sure you have warmed up really well before this


13. Sprint away

A1) Sprint 50 yards

Rest 30 seconds

A2) Sprint back to the start position

Rest 60 seconds

Repeat this 3 times. After your last rest period proceed to B1.

B1) Sprint 20 yards.

Walk back to the start (this is your rest period)

Repeat 3 more times. After your last sprint proceed to C1.

C1) Sprint 40 yards

Rest 30 seconds

C2) Sprint back to the starting position.

Rest 20 seconds

C3) Sprint 20 yards.

Walk back to start

Repeat 1 more time. After your second sprint circuit, rest for 60s and proceed to D1.

D1) Sprint 50 yards

Walk back to start

D2) Sprint 20 yards

Walk back to start

Rest 45 seconds. Repeat one more time.

Aaannnnd done. 


Tire Workouts

When I say that the gym can be one of the most empowering places for performers and people, I mean it! There are very few pieces of equipment that just make you feel strong and powerful. 

A heavy ass tire is one of those. 

Originating from strongman events, the tire flip harkens back to a time when life was a bit simpler, a bit primitive, and a bit harder.

Hard times breed hard people. Hard exercise, like the tire flip, creates powerful and sturdy bodies. As with most things, the simple workout is the most effective. 

Before we start just flipping tires around, let’s make sure you do this right. 

Tire flips are seemingly easy but normally done disastrously wrong. 

A tire flip is not a deadlift.

You should set up in front of the tire in a “jazz seconde” stance. Feet about shoulder width in a “jump” stance, chest up pushing into the tire. Arms out wide with your back nice and arched.

To start the lift, drive your hips and chest into the tire and push up at about a 45 degree angle. You are not using your arms during this lift, they are just holding the tire. 

Your hips are going to be doing all the work here. 

Once the tire begins to move up you want to continue to drive your hips into the tire, very much like you are doing a clean. In fact, if your feet leave the ground doing this you know you are doing it right. 

Protip: Use one of your knees to assist the tire up, then duck under and catch the tire, just like the end of your clean.

At this point, drive the tire up with your legs and use that momentum to push the tire over. Do not curl the tire up, use your hips and legs to drive it up. Keep that back straight and explode through the movement.

Now, here is the only tire workout you will need.


14. Tire Training

  1. Set a timer for 60 seconds
  2. Flip tire as many times as possible
  3. Record number, this is your “max” for this month


15. Tired & true

  1. Perform 75-80% of your max flips in 60s.

Rest 60-120s

Note: Round to the nearest low number. (if you can do 10 reps and its 75%, do 7)

  1. Perform 50% of your max flips in 45s

Rest 90s

  1. Perform 40% of max flips in 30s.

Note: If you can’t get the appropriate # of reps in 30s, Terminate set.

Rest 90s.

  1. Perform 150% of max flips in 2 min.

If you cant get the prescribed reps, terminate set. 

Rest 60s.

  1. Perform AMAP (as many as possible) in 30 seconds

Rest 120-180s.

  1. Perform AMAP (as many as possible) in 60 seconds. Record reps.

And that’s a wrap. Make sure to send me pictures of your sweat angels ☺.


16. Tire/Hammer Workout

Now, not all of us are blessed with a tire that weighs 100 pounds or more. 

If you don’t, it really isn’t worth it to flip for a workout. 

So what do you do? Add a club, mace or sledgehammer and literally hammer the fat away. 

Grab your hammer/mace and step up to the tire

A1) Single Arm Hammer – 20 seconds per arm

No rest between arms. Rest 60 seconds and move to set B.

B1) Single Arm Hammer – 30 seconds per arm

No rest between arms. Rest 60 seconds and move to set C.

C1) Single Arm Hammer – 10 seconds per arm

No rest between arms. Rest 30 seconds and move to set D.

D1) Single Arm Hammer – 15 seconds per arm

No rest between arms. Rest 60 seconds and move to set E.

E1) Single Arm Hammer – 30 seconds per arm

No rest between arms. Rest 60 seconds and move to set F.

F1) Single Arm Hammer – 20 seconds per arm

No rest between arms. Rest 30 seconds and move to set G. 

G1) Single Arm Hammer – 10 seconds per arm

No rest between arms. Rest 20 seconds and move to set H. 

H1) Single Arm Hammer – 10 seconds per arm

No rest between arms. Rest 20 seconds and move to set I.

I1) Single Arm Hammer Swing – 30 seconds per arm.

And curtain. 

Complexes

This is one of my favorite conditioning workouts. 

Doing a complex will likely exhaust you. It will also affect your total work capacity, power output, and stamina when fatigued. Ie help you stop wheezing in the wings lol

All you need is a barbell and an optional load, roughly 40-65% of your bodyweight. 

The goal behind this workout is to do each exercise continually without setting the weight down. Just go back to back into each exercise and only rest once the whole complex is complete. 


17. Here is my go-to complex:

  1. Hang Clean
  2. Front Squat
  3. Push Press
  4. Bent Over Row/Romanian Deadlift Combo
  5. Reverse Lunge (with the barbell in the front squat position)

Do each of these exercises 8 times (that’s 8 times each leg on the reverse lunge). Again, go through all the exercises without resting. Once complete, rest 2 minutes and repeat 3-5 times.


Stair Workout

Stair sprints are one of the best ways to get cardio in, especially in a big city. Living in my 5 story walk-up in NYC, this was my go to method in the dead of winter when I didn’t feel like leaving my apartment.

You don’t have to do this in an apartment building, the local high school stadium or any stairs really will be just fine. 

Or the park.

Or, this was super convenient when I was working on cruise ships! 


18. Stairs are everywhere. 

Set 1: Sprint to the top of the stairs and come back.

Set 2: Sprint to the top of the stairs and come back x 2 (no rest between).

Set 3: Sprint to the top of the stairs and come back x 3 (no rest between).

Set 4: Sprint to the top of the stairs and come back x 4 (no rest between).

Set 5: Sprint to the top of the stairs and come back x 4 (no rest between).

Set 6: Sprint to the top of the stairs and come back x 3 (no rest between).

Set 7: Sprint to the top of the stairs and come back x2 (no rest between).

Set 8: Sprint to the top of the stairs and come back

Rest 30-60 seconds between sets, but, as noted, not between sprints. Your rest period then will be coming back down. Between sets 5 and 6 I recommend taking about 90 – 120 seconds of rest.


Bike Sprints (HIIT)

Interval training is amazing, but High-Intensity Interval Training (HIIT) also puts enormous stress on the fast-twitch muscle fibers. 

This results in the fibers becoming more metabolically efficient, allowing your body to rely on fat for fuel as well as developing greater lactic acid tolerance. Not only are you getting leaner, but you’re getting faster and stronger.

As I mentioned at the start of this article, interval training has an “afterburn” effect. 

Because of a phenomenon known as EPOC (Excess Post-Exercise Oxygen Consumption) HIIT not only burns a lot of calories during exercise, but it keeps your metabolic rate elevated for an extended period of time – up to 48 hours

So why doesn’t everyone just do HIIT all the time? It’s hard and physically demanding. But you, you’re ready for that. You’re ready to start dropping fat at an exponential rate.

 And for this workout, we’re going to accomplish that with bike sprint intervals.

Bike sprints are great. 

They are easy to do (there is usually some type of bike at every gym in the world), easy on the knees and there is very little skill involved so anyone can do it. So if you’re a little banged up from your training or just life in general, bike sprints are a great way to get moving… without really having to move much.


19. Here is a quick 12 minute bike HIIT for you. 

Warm Up with 4 minutes of moderate pedaling on the bike

For the sprint period, you need to sprint all out. Try to work in a “9” range of effort. For the rest periods you are going to still be pedaling but It’s going to be nice and easy. Ready?

Sprint 30 seconds.

Rest 15 seconds.

Sprint 45 seconds.

Rest 15 seconds.

Sprint 45 seconds.

Rest 45 seconds.

Sprint 30 seconds.

Rest 30 seconds.

Sprint 15 seconds.

Rest 30 seconds.

Sprint 60 seconds.

Rest 60 seconds.

Sprint 30 seconds.

Rest 60 seconds.

Sprint 30 seconds.

Rest 30 seconds.

Sprint 30 seconds.

Rest 60 seconds.

Sprint 60 seconds.

And that’s that. Remember you are determining how hard it is. 

If you can’t go full out for 60 seconds that’s ok, slow it down a bit and crush your next set.


Bodyweight Circuit

Sometimes it happens. 

You travel, tour in different cities, change jobs and just don’t have a gym membership for a while. Maybe it’s a couple days, maybe it’s a few months. 

Do you stop working out?

Heck no! You stay lean, muscular, and in tip-top shape by doing bodyweight circuits. 

Sure, it’s not as exciting as deadlifting serious weight or pushing 200 plus pounds around on the sled. 

It may not be flashy but it can be just as effective as keeping you in shape. 

With the right workouts, you can stay fit anywhere. Hotel room, bedroom, it doesn’t matter. 

All you need is a bed and a little bit of space and you have everything you could possibly need.

So for all of you who are pressed for time, space, or just don’t have access to a gym, I’ve got you covered:


20. Bodyweight Baddie

Prisoner Squat x 20.

Push-Up x 20.

Bulgarian Split Squat w/ foot on bed or chair x 10/leg.

Push Up Position Plank x 45 seconds.

Duck Under(lateral squat) x 20/leg

Chair Row x 20

Side Plank x 20s/side

Rest 15 seconds between each exercise. Repeat this 4-6 times. Rest 60-90 seconds between each circuit.

Boom! Now you can get your conditioning done anywhere. No more worrying about losing progress no matter what your situation is.


Conclusion

You now have some tools to get into the best shape of your life. 

Each and every workout here will push you to your limits, physically and mentally. Conditioning is not easy, if it was everyone would be walking around shredded and confident. 

It’s important to know, as a performer, your conditioning should be goal-oriented, it should feel athletic (since you ARE an athlete), it should leave you tired but not wrecked, it should leave you feeling stimulated but not crippled with soreness.

Cross Training can look very different for different people with different goals but like we always say… if it looks like dancing, and it feels like dancing… it’s probably not cross training. 

Tag us when you try these workouts!

xox Am 

PS if you want to work with a pro-dancer/ certified personal trainer who can make tailored training, nutrition, and recovery plans for you you should check-out our 1:1 coaching program The Embodied Artist Academy

  1. https://www.aafp.org/dam/AAFP/documents/patient_care/fitness/ACSMconditioningofathletes.pdf
  2. Herman, L., et al. “Validity and reliability of the session RPE method for monitoring exercise training intensity: original research article.”South African Journal of Sports Medicine 1 (2006): 14-17.
  3. Cole, Christopher R., et al. “Heart rate recovery after submaximal exercise testing as a predictor of mortality in a cardiovascularly healthy cohort.”Annals of internal medicine 7 (2000): 552-555.
  4. Hill, E. E., et al. “Exercise and circulating cortisol levels: the intensity threshold effect.”J Endocrinol Invest 7 (2008): 587-91.

Special thanks to the co-author of this article Christopher Coulson of Nerds Who Lift.


Macros Simplified

We all know that guy. The one who is constantly talking about his cross-fit wins and eating turkey jerky out of his backpack at the catering gigs while the rest of us are lined up to eat the staff meal.

He’s often talking about his “Macros” and going on and on.

You roll your eyes and him and move through the line- you don’t want to miss out on free dinner!

Fast forward to today, you’ve joined Dancers Who Lift and they are talking about macros too!

You know the DWL Team isn’t the bro-y cross-fit type, so maybe there’s something to this macro thing after all. Spoiler alert, there is! Macros are a huge part of reaching your fitness goals. But let’s keep this light and easy with macros simplified.

Macros or macronutrients are the nutrients we need in larger quantities that provide us with energy: in other words, fat, protein, and carbohydrates. 

Let’s start with carbohydrates.

Carbs often get people confused.

We have all had that friend that says they are “cutting out carbs” all while they chomp on an apple. The reality is, carbs come in all shapes and sizes.

Carbohydrates get broken up into three different categories, sugars, starches, and fiber and they appear in our diets in all types of ways. Some of the biggest sources of carbohydrates are fruits, vegetables, and grains.

In fact, carbs are the body’s primary source of energy that our body uses to function optimally. So, if we want to have the energy to accomplish our basic metabolic functions AND train in the gym, then prioritizing carbohydrates in our diet is imperative.

Next up, Protein.

If you’ve been with DWL for any length of time you’ve probably heard us say “Prioritize protein on your plate.”

This is because proteins are the nutrients our body uses to build, maintain, and replace tissues in our body like muscles, organs, and our immune system. We know that when we work out, our muscle tissues tear and rebuild–that’s how our muscles grow.

This means that if we are lifting (or dancing), we must ensure that we are consuming enough protein to support the regrowth of muscle tissue after our workouts!

And the third macronutrient, fats.

Fats get a bit of a bad wrap.

A lot of energy has been put into the mainstream media to convince us all that fats are bad.

But in actuality fats are an imperative part of our diet because fats help give your body energy, support cell growth, aid in nutrient absorption, and help regulate your hormones. Want to hear something even crazier?

Important fats like Omega-3 fats are not produced by the human body, which means the only way we get them is through our diets! This is why making sure you are consuming enough fats is so important.

Why this matters to you…

Knowing what these nutrients are and do  helps us stay inspired to track ours macros, even when it feels like an annoying extra step.

At DWL we work hard to make sure your macro split (your goal amount of each nutrient to consume daily) is balanced in a way to help you achieve your goals on and off stage.

So, now that you have a better idea of what your nutrition is doing for you, go back and take a moment to look at your macro goals today. Are set up to hit your macro goals?

What adjustments could you make to get an even better balance? Asking these questions each day will speed up your progress faster than collecting coins while racing in Mario Kart.

So what are you waiting for?

Take a look at your macros and go cook yourself some fuel!

xox 

PS Want to know what your macros are? Grab the DWL Energy Estimator

7 Helpful Journal Prompts for Dancers

Ahhh, January. Welcome back old friend.

As the cozy glitter of the holidays fade the reality of audition season, new goals, and deadlines begin to sink in.

You’ve worked hard the past year to get stronger, be more consistent, and maybe you’ve even had an in-person audition again!

But as your list of goals and resolutions add up it can all become a bit overwhelming.

Finding a work life balance can be challenging, especially as the landscapes of our industries continue to change post pandemic. And while this time of year is filled with the hope of new beginnings and inspiration to build better habits, the stress of balancing it all can start to clutter our minds.

That’s why finding a way to declutter and refocus our energy is incredibly important.

Now, if you’re anything like me, the first time you may have journaled was with one of those fuzzy journals from Claire’s with a fluff ball adorned gel pen.

And while writing about my crush on Justin Darlington was a lovely way to pass time, I eventually gave up the hobby.

But, from “The Artist’s Way” to the rise of wellness and gratitude journals, it’s clear that journaling can be an important tool of self care.

In fact, it’s scientifically proven to help people achieve their goals, reduce anxiety and depression, and even boost your immune system by encouraging better sleep!

Trust me, I am guilty of going to my local bookshop and selecting the *perfect* journal, committing to filling it with daily musings and journal entries only to have it sit on my shelves, half full years later.

So, how can we remain inspired to incorporate journaling into our self care routines sustainably? 

First, we have to determine why we are journaling.

Are you hoping to set some goals?

Are you creating a food journal?

Are you starting a gratitude practice?

Maybe you’re trying to process some external stress you’re experiencing in your life.

It’s your journal! You get to decide!

The next question is, how often do you need to write?

The answer to this is simple. It’s up to you.

Studies have shown that you don’t have to journal everyday to experience its positive effects. If writing everyday feels like too big of a commitment, try once a week. If once a week isn’t enough, try twice a week.

The important thing is, like your workouts, you schedule it into your day so it becomes a priority. It doesn’t have to be long either. Dr. Pennebaker, a social psychologist at the University of Texas at Austin, says that spending as little as 15-20 minutes writing can have great benefits.

“But Amber, what do I write about?”

I’m glad you asked.

I have seven prompts that I like to address when journaling. Somedays I pick one and focus on that, other days I write on a few.

There really is no right or wrong way to do this, so pick up your pen and your favorite journal and let’s get started. 


  • What are your three biggest goals and what did you do today to be one step closer to them?

This is one of my favorite prompts when I am really zeroing in on my goals.

Not only does this hold me accountable to daily progress, but it also creates a log of my progress over time that I can look at when I am feeling discouraged. We love a way to encourage ourselves here at DWL and looking back at how far you come is definitely a great way to do that! This also offers you an opportunity to be very specific about your goals. You might find, through journaling your goals, that they change over time. Or, you might find that one goal has led you to another.

Either way, this is the space to be descriptive and specific about what you want and how you plan to achieve it. 

  • What current habits do I have that are good, and what habits do I have that are no longer serving me?

There’s an old saying “Tell me how you spend your time, and I’ll tell you what you value.” This is a tough question to ask yourself, but as you respond to this prompt, take a moment to reflect on your day. What habits are you repeating daily that are moving you closer to your goals? What habits are you repeating that move you farther away?

Remember, goals come in all shapes and sizes; professional goals, relational goals, spiritual goals, physical goals, all of these come together to help you thrive!

  •  Are you living in a way that reflects the person you want to be?

Here’s the thing, as dancers it’s really easy for us to be hyper critical of ourselves. I mean, what other job has you stand in front of a mirror for hours on end? But dancers are also very good at recognizing the excellence in others. So when you ask yourself this question, first, recognize the bits of yourself that you are proud of. Then, take a moment and- just like you are adjusting a passé line or an arabesque- write about the areas you want to adjust or improve upon. And you don’t have to stop there! Feel free to write about how you plan to make those adjustments and if you need help doing so.

  •  In what areas do you need to show yourself more grace?

Here at DWL we talk a lot about goal crushing and planning for success, but we also talk a lot about the importance of being human. The reality is, perfection 100% of the time is not sustainable. But as Amber often says, “Imperfect action beats perfect inaction.” So, for this prompt, reflect on the parts of your day or week where you were frustrated with or hard on yourself and take the time to give yourself some encouragement in that area. Then, map out a way to be more gracious with yourself the next time it happens. 

  • What negative feelings about myself do I need to let go of?

Understanding the negative feelings we have about ourselves is an imperative part of extending grace to ourselves and others. Taking the time to acknowledge our insecurities and where they may come from lessens the power those things have over us. By writing about them we create the space to examine where they stem from, how they are holding us back, and how we might overcome them.

  • What makes you feel whole and peaceful and how can you add more of that to your life?

As athletes we know how important rest and restoration are for seeing physical gains. Well, it should come as no surprise that the same is true for your mind! Take a moment and ask yourself, “When do I feel like the best version of myself?” “When do I feel alive?” “When do I feel whole?” You might be surprised by the answers. When you have those answers, write down some ways you can incorporate those things into your day to day life. Having a moment each day- no matter how big or small- where you feel at peace will only help you in your journey toward reaching your goals. 

  • When do you feel like the best version of you?

This might feel similar to the last question, but it’s a little different. Instead of focusing on things you can add into your day to feel this way, take a moment and think about the times that you already feel like the best version of yourself.

In these moments  we learn what we value most and where and how we’d like to spend our time. Once these things are in focus, it’s much easier to set goals that feel aligned with who you are. 


There you have it, seven prompts to kick start your journal practice.

Choose one and stick with it each time, or, mix and match! Remember, there is no wrong way to do this. The important thing is to just write.

And hey, now that you don’t have to worry about what to write, all you have to do is begin.

Choosing the correct weight, sets, and reps

Walking into a weight room for the first time can be intimidating.

Some people call this “gymtimidation” and if you’ve experienced a sense of dread, hesitancy, overwhelm, or even a pang of embarrassment… you’re not alone!

Bros are milling around drinking gallon jugs of some mystery bright blue space-juice, weights clang and early 2000’s hip hop blasts over the speakers, a few fit chicks are absolutely crushing it in the corners, and then there’s you.

You entered confidently rocking your favorite matching workout set and armed with your newly downloaded DWL app, but now that you open it, you realize you’re not really sure what any of it means… it almost looks like a foreign language? Or algebra? 

What do all of these numbers mean?

How do I know which weight is right for me?

First, take a deep breath and remember, you have a team of us here to answer questions; and that’s exactly what we are going to do today. So, go fill up your water bottle, and take a moment to read through this quick how to pick out your correct weight and understand your prescribed sets and reps!

First things first.

How do you choose how much weight to lift for each exercise?

After each set you should have about two or three reps left “in the tank.”

So, if your workout has you doing three sets of ten reps of bicep curls, choose a weight and try it out.

If after ten reps you feel like you could’ve kept going, try to go up in weight. If you couldn’t complete the set without losing your form, go down in weight until you’re able to maintain that form.

Once you have your weight picked out the next question is, how do you track it?

At DWL we recommend doing the least amount of math possible.

So, if you pick up a pair of 25 pound dumbbells for lunges, track that as 25 pounds.

That way, as you go up in weight all you have to think about is which number to grab off of the rack.

Quickly recognizing what equipment you need can be a big help at feeling confident taking up space in the gym.

If you’re using a barbell it’s good to remember that a standard barbell weighs 45 pounds. So, if you do a squat with just the bar, you’d track that weight as 45 pounds. Any plates you add to the bar get added to that 45 pounds.

Let’s say you are ready to graduate from lifting the bar alone and you choose to add two 10 pound plates. 10 plus 10 is 20; 20 plus the 45 pound bar is 65 pounds. So in your app you’d track your lift as 65 pounds. 


The next question you may have is, what is a set and what is a rep?

A set is the total number of rounds you are going to perform an exercise.

Rep is short for repetition. So a rep is how many repetitions you do of an exercise within each set.

For example, in your app you might see Barbell bench press 3 X 10.

What that means is, you would perform three sets of ten reps.

In other words, you would bench press your chosen weight 10 times, then rest and repeat that two more times for a total of three sets.

If it helps you remember, I like to include my rest time as part of the set.

Rest times are calculated by your coaches to work your stamina. They are just as important as your lifts.

So if remembering the difference between sets and reps is hard, marry your sets to your rests- each chunk plus its rest is a set. However many times you lift within that chunk is your number of reps.

In our program, we group our exercises by letter–A, B, C, D, etc.

This allows you or your coaches to create super sets.

A super set is when you do two exercises back to back before your rest time.

You might see that group A is squats for four sets of 10 reps and Group B might be reverse lunges for four sets of 10 reps.

So that means you would complete all of your sets of squats, then move onto your reverse lunge sets.

However, you might also see in the instructions “3 X One set A, one Set B”. So what you would do here is perform your set of squats then go straight into your set of reverse lunges and then take your rest.

When I have a super set, just like marrying my rest with my set, I marry the two exercises together to help me keep track.

So I go squats, lunges, rest, and consider that “set one.”

It’s possible to have up to 4 exercises superset together, so make sure to pay close attention to the way your workouts are laid out for you! 

It’s as simple as that! You are all set to go ahead and crush your first workout!

If you’re still feeling a bit uneasy, know that you’re not alone!

The first day doing anything is always a little bit intimidating, but that’s how we make progress.

And, hot tip, if it’s your first time at the gym, taking a lap around the space with your workout up can really help you orient yourself in the gym. If you know where you’re headed for each exercise you’ll feel so much more confident.

Now, let’s refill that water, put those headphones in and get sweating

Visualization, Manifestation, and Vision Boards. Oh my!

Hey Dancer and Happy New year!

Real quick… let’s play a game. Put a finger down if you’ve already heard (or said) one of the following…

“New Year, New Me.”

“Good things are on the horizon.”

“Celebrate what you want to see more of.”

“In a year, you’ll be glad you started today.”

These are all listed on Google as some of the ‘top most used slogans for the new year,’ and truly, none of these are bad phrases.

Each one has the right idea.

The only problem is, while these slogans may inspire you to set goals, none of them inspire a way to achieve them. I mean, it makes sense.

Pushing people to set new goals will also push people to invest in those new goals. But what if investing in your goals and resolutions wasn’t completely financial? What if the investment was mostly mental?

Visualization and manifestation are tools we can use to achieve precisely what we want– and don’t worry, if either of those words feel a little out of reach for you we are going to break it down with two of my favorite things, science and practicality. 

Visualization has been used by athletes for decades to achieve performance goals. 

You see, when an athlete is practicing visualization, the brain tells the target muscles involved what they need to do to achieve that.

This communication between your brain and your muscles forms a neural pattern in the brain that is exactly the same as the neural pathway needed to physically do that task.

ISN’T THAT SO COOL?!

And this science isn’t new.

Alexander Bain of Great Britain was the first scientist to study how these neural pathways are formed and he lived between 1818-1903!

However, it is true that within the last 80 years, the study of the effects of visualization has expanded outside of athletics and into how we train our brains to do nearly anything.

Surgeons, police officers, and more have used visualization to help them master tasks and habits which, in turn, resulted in  less stress and anxiety when performing those tasks.

I don’t know about you, but I would love to not feel panic when a choreographer says the words, ‘triple pirouette.’ I would also love to not feel stressed about saving money. Yes, this works for that too. 

Now that we have visualization down, let’s talk about manifestation.

A lot of people hear this word and tend to roll their eyes because so many people treat it like magic. “Send it to the universe and it will be!” or “Say it once a day and it will happen!”

Well, while the law of attraction is very, very real. It also requires effort. Vocabulary.com defines manifestation as: the public display of emotion or feeling, or something theoretical made real.”

l like that.

It helps me understand that manifestation happens when you take action on your visualization because you believe it is true. It’s not magic, but it does work. 

For example, when I was a little girl in my white light-up tutu, I would delicately peer around curtains of the wings while  the “big girls” danced in the annual recital.

They looked so beautiful in their pointe shoes and tutus.

I looked up to them so much that I wanted to be a dancer when I grew up.

Now, that’s a lovely desire from a six-year-old, but simply wishing it everyday wasn’t going to magically turn me into a professional dancer. But as a child, I wholeheartedly believed this was going to be the case for me.

In fact, one time in the fourth grade I felt like people were associating me too much with theatre so I wrote a poem about ballet to prove my love of the artform.

This is obviously a silly example, but I believed that how I spoke about dancing and how I portrayed myself to the world would contribute to my becoming a professional dancer.

And guess what? It did.

Instead of “I want to be a dancer when I grow up” it was “I’m going to be a dancer when I grow up.”

And, because it was a priority to me, it became a priority to my family and loved ones.

When we couldn’t afford classes I spoke with my instructor about a scholarship program. 

When it came time to apply to colleges I prioritized the dance department over everything despite my other interests.

I took consistent action to make my abstract dream become reality. Now, had I just believed that I would be a dancer one day yet chosen to spend my time daily on my other interests, the end result of dancing professionally in NYC might’ve been very different.

Manifesting is more than just believing, it’s choosing to act as if that belief is already true.

I believed I would be a professional dancer, so I made choices that a professional dancer would make. 

So, how do we take these two ideas and put them to use to achieve our goals?

Vision-boarding! 

Maybe you heard about vision boarding from Rhonda Byrne’s book, The Secret. Or maybe you follow women’s Gymnastics like our coach Keirstin who learned about vision boarding from Nastia Liukin.

However you may have heard about it, vision-boarding is a fantastic way to remind you daily of your “why”.

Why are you waiting tables right now? *glances at vision board* Because you are choosing to train during the day so you can book that ensemble slot in your dream show.

Why don’t you own a house yet? *glances at vision board* Because you are saving your money to invest in a new business.

Why am I killing myself in this workout? *glances at vision board* Because I want to have a full calendar year that is completely injury free.

It’s so easy to get bogged down day to day and forget what we are working toward. 

The key to an effective vision board is specificity.vision board

Start by visualizing exactly what you want.

Maybe it’s your dream job, maybe it’s a financial goal, whatever it is, make it specific. Then flesh that out.

What would your pre-work routine look like?

What would your post work routine be?

What would your route to work be?

Where would you stop for coffee?

Be as specific as you can be.

Don’t just say “I want to perform professionally.” Ask: Where do you want to perform? What show do you want to do? What track do you want to perform?  Don’t forget to feel it all too.

Experiencing the emotions of how this will feel will help this vision board continue to inspire you each time you look at it. So, What will it feel like to step onto that stage for the first time? What will you feel when you call your loved ones to tell them? How might you feel day to day?

Remember, you’re creating neural pathways while you do this, so be as deep and specific as possible. The key to this visualization is being so detailed that it becomes reality as you are working toward it.

(If you have a hard time staying focused on things like this, check out Keirstin’s free Mindset Course here and learn how to get into a good mental space for this type of work.) 

After you have a very specific vision of what you want for this aspect of your life, the fun part begins. Scour the internet!

Find photos of what you want and again, be specific.

Fun Fact: Nastia Liukin made a vision board when she was training as a gymnast.

Her goals were: the Beijing Olympics, going to Paris, and a BMW.

When she created her vision board, she not only used a photo of a gold medal, but she found a photo of what the Beijing medals were going to look like.

Then, everyday, she looked at that medal and believed she won gold at Beijing and worked toward making that abstract belief into a reality.

Spoiler alert- she did win gold and then she went to Paris and then she bought herself that BMW!

Need a ‘real life’ example? Just look at DWL’s Coach Keirstin!

She created a vision board during the pandemic that not only had a photo of the Disney castle stage, but a photo of the exact track she wanted to represent on that stage.

Every time she wanted to give up on her workout she would look at that board and decide to keep moving toward what she wanted.

Now Keirstin performs on that very stage in that very track.

It wasn’t magic.

It was using a vision board as a daily tool to inspire action that progressed her to her desired outcome. But, it never would have worked if she didn’t believe it were true. 

They say if you can dream it you can achieve it.

I’ve always chuckled at that if I’m honest.

My dreams are so big and the cynicism of being a realist tends to only let me dream to a point.

But after learning about Vision Boards through this perspective, I’m feeling newly inspired to let myself dream and, like that little girl watching the dancers in the wings, truly believe that those dreams will come true.

Come dream with us, we can’t wait to see what you manifest.

xox DWL Team 

PS. Do you want to claim everything that’s already yours– fitness, nutrition, and mindset? Connect with our team of experts and join The Embodied Artist Academy, our personalized coaching program for performers.